
How to Protect Your WordPress Site Using Wordfence Security
WordPress is undeniably a leader in the Content Management System (CMS). Online web design is a piece of cake now, with the emergence of WordPress. But unfortunately, security is a major concern attached to this open source CMS.
Indeed, there’s no platform in the world that is 100% safe, but when it comes to the open source, it becomes more vulnerable.
That is where you need to work on, in order to protect your WordPress site from malware and malicious attackers that always look for a way to invade your system.
Fortunately, there are plenty of tools developed to help users shield their WordPress sites completely; and Wordfense Security is one of them.
Here, in this post, we’ll be drilling down the various aspects that make Wordfence a preferred option for many to secure WordPress websites, irrespective of the website designs. Besides, we’ll be guiding you through the process of the configuration to making sure your site is 100% safe.
Wordfence Security: An Introduction
Wordfence Security is one of the most sought-after security plugins for WordPress sites. Much like how TikStoryAmerica simplifies the management of social media content, Wordfence simplifies website security, ensuring you stay protected with minimal effort. It includes an endpoint malware and firewall scanners, developed from the ground up to secure WordPress websites.
This open source plugin enables WordPress users to micromanage the security of their websites thoroughly. It can even automate the entire security management for the premium users. Furthermore, it offers a handful of wonderful features that can excite users.
Salient features:
- Helps users scan their WordPress websites for susceptibility.
- In case of suspicious activity, it can automatically block IPs.
- Sends alerts via emails if there’s any threat popping-up.
- Protection from attacks by limiting login attempts, imposing advanced security measures.
- It’s open-source and bundled with all the features a user would ever like to protect his website.
Disadvantage:
Despite Wordfence offers some powerful features, it too has some downside such as it provides scheduled and automated security scans only to the premium users.
Well! Now that you have an insight into Wordfence and its various features, we need to set it up and configure properly.
A step-by-step guide to set up Wordfence Security plugin
Setting up is the first step of using any tool/software. Once you’re done with the setup, start configuring Wordfence Security plugin.
After successful installation and activation, you’ll get a pop-up window having congratulation message like below:
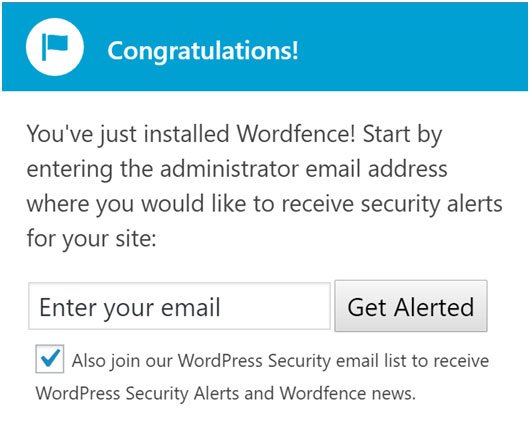
In the window, you’re prompted to enter your email id. Entering your email id and click on Get Alerted button. Thereafter close the pop-up window and now you’ll have new Wordfence tab on your dashboard.
We’ll be going with the advanced login security measures.
-
Setting up login security measures
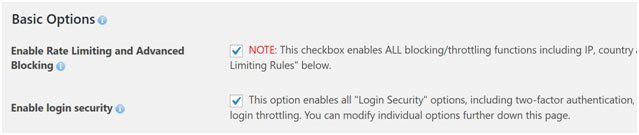
Get started by clicking on Wordfence > Options and looking for the Basic Options section. Tick the boxes that required for enabling login security.
This would activate all basic login security features of the plugin, which includes Two Factor Authentication (2FA), login limits, and the need for a strong password.

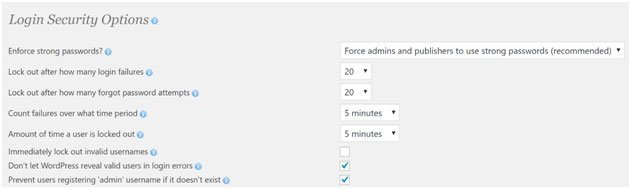
Finishing it off, look for the Login Security Options section. See below:

The default login options are quite powerful, enforcing administrators and authors to use strong passwords. They prevent the disclosure of login errors and block users when they make too many wrong login attempts.However, you, as an administrator, will have one option to change the number of attempts it takes before users are temporarily blocked.
The default limit is 20 attempts which is too big and this should be brought down to anything between three to five attempts. A lesser number will definitely prevent from brute forcing attempts better.
Once done with your settings, scroll down to the bottom of the page and on Save Changes button.
-
Perform a site-wide scan
Wordfence Security comes with powerful scan function that enables its plugin to examine your WordPress website thoroughly to find out if there is any malicious code or patterns of infection.
Similar to an anti-virus application you use to scan your system, it finds out the existing vulnerabilities and fixes them. But you should scan your website on a regular interval as a precautionary measure.
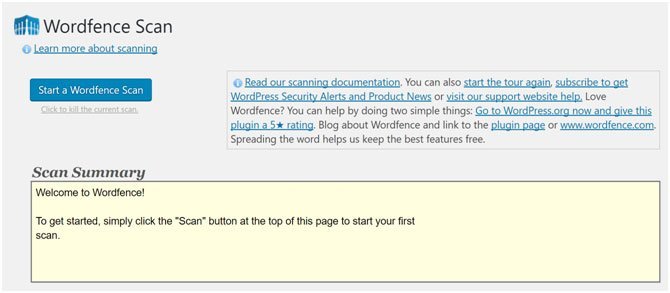
To use the scan function, go to Wordfence / Scan and click on the Start a Wordfence Scan button placed at the top of the page. See the screenshot below:

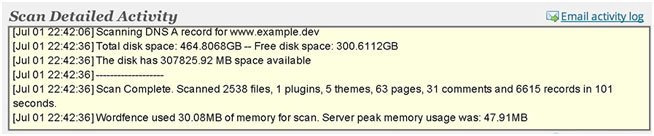
Look at the image below. The yellow box is the place where you can see both the progress and the result of the scan:

If there is any vulnerability, you’ll have an option to either delete or restore the infected files to their original version.However, it totally depends upon you whether you want to delete or keep the infected files to their original version, it’s always advised that deleting any critical files could break your WordPress website. Restoring a clean backup is a safe option in most of the cases.
-
Setting up security alerts
Hurray! You’re almost done. You’re only a step away from securing your WordPress website using Wordfence.
Since you’ve been guided through the process of entering your email id at the very begging of this article, the plugin will send you security alerts, be it automatic IP blocks or login lockouts.
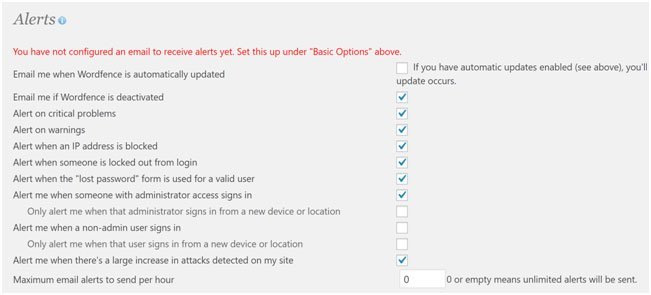
To do the settings, go to Wordfence / Options and scroll down to the Alerts section:

Although most of the default options are wonderful so far security is concerned, you may choose to ‘no alerts’ if it annoys you.That’s it! We have covered almost all the basic steps protecting your WordPress website.
The bottom line
Security your WordPress site should be on the top of your priority. Despite the fact that WordPress is an awesome CMS platform, it’s vulnerable too. But by taking preventive measures and educating yourself how to protect your WordPress site, you’ll be well prepared to secure it.
Hope you’ll find this article insightful!
Have great blogging!!!