
Interactive Analog Clock
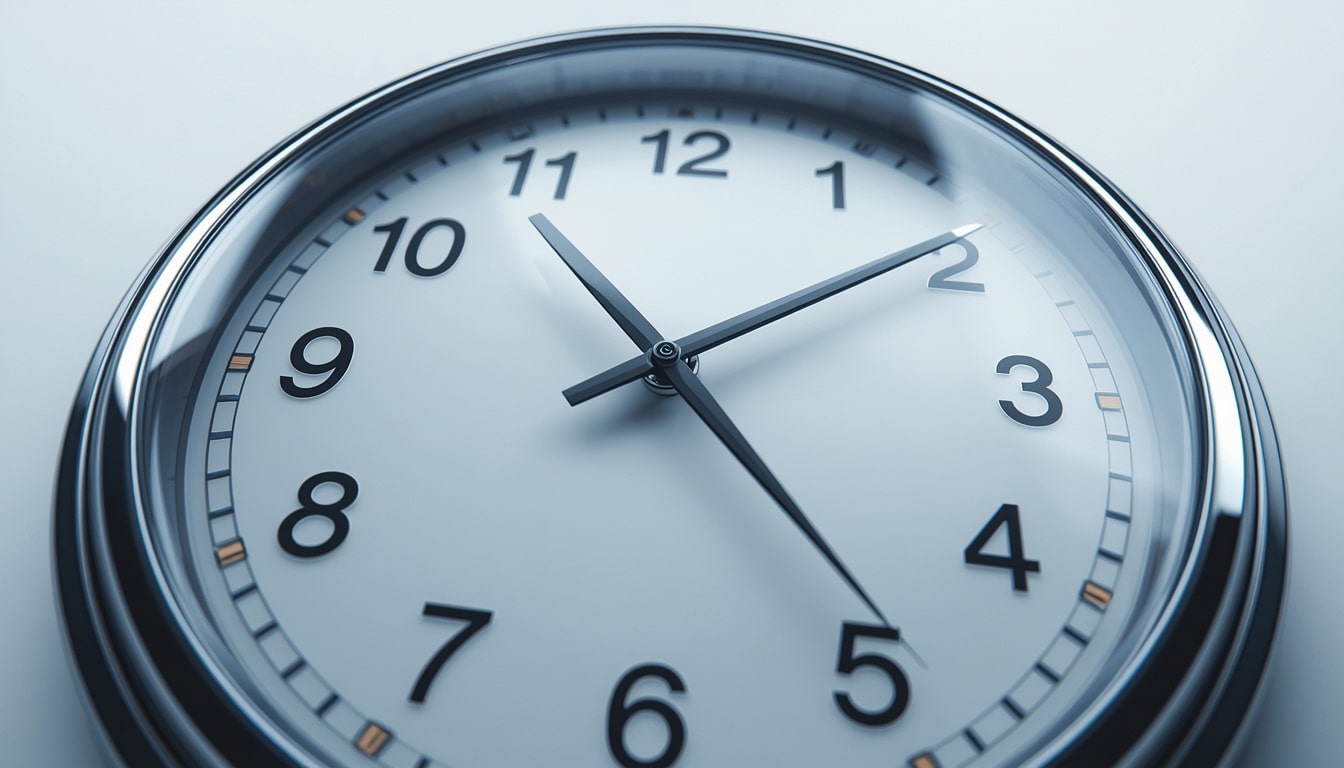
There is something oddly satisfying about watching the hands of an analog clock move around its face.
A digital display tells you the time almost instantly, neat and tidy, but an Interactive Analog Clock asks you to notice where things are, count a little, think a little,
And sometimes get it wrong before getting it right. That small act of reading time can become a surprisingly useful skill.
For a child learning about time, the circular clock face can look like a tiny puzzle. Twelve numbers sit quietly around the edge, while the hour hand, minute hand, and sometimes second hand keep moving through them.
At first it can feel confusing, especially when the hour hand is between two numbers. Then suddenly, after enough practice, the pattern clicks. It becomes almost like reading a familiar road map.
An interactive version makes this learning experience more lively. Instead of merely looking at a picture of a clock, you can drag the hands, set a particular time, check the result, and practice again.
That little bit of movement matters, because telling time is not just about memorizing numbers; it’s about understanding movement, intervals, and relationships.
What Is an Interactive Analog Clock?
An Interactive Analog Clock is a digital learning or time-setting tool designed to behave like a traditional analog clock. It usually displays a circular clock face with numbers from 1 to 12, tick marks, and movable hands.
The useful part is the interaction. You may be able to drag the hour hand or minute hand to a particular position and watch the displayed time change. Some versions also show seconds, while others connect the analog display with a digital time format.
This makes the clock more than a picture. It becomes a little practice space where you can experiment without worrying about breaking anything, which is honestly one of the nicest things about learning with an interactive tool.
Why an Interactive Analog Clock Helps With Telling Time
Learning to tell time involves several ideas at once. A learner needs to recognize numbers, understand that the numbers represent intervals, distinguish between hands, and understand that the hands move at different speeds.
An Interactive Analog Clock brings these ideas together visually. When the minute hand moves from 12 to 1, for example, the learner can see that five minutes have passed. When it reaches 6, the learner can connect that position with 30 minutes.
There is also an important difference between memorizing “3 means fifteen minutes” and actually seeing the minute hand travel to 3. The second experience gives the number a physical position, so to speak. It sticks better in the mind.
How to Read an Analog Clock Step by Step
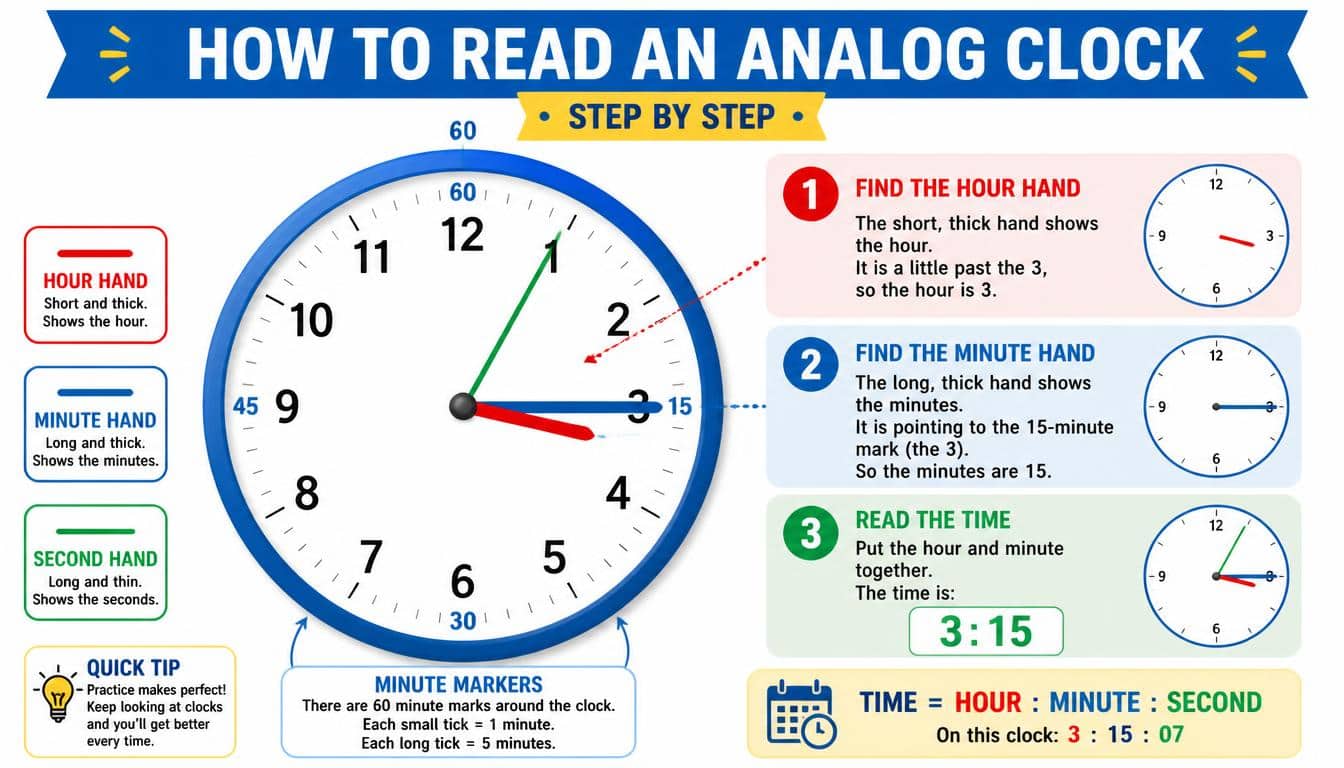
If you’re wondering how to read an analog clock, it helps to avoid staring at all the hands at once. Start with one hand, then add the next. The clock suddenly becomes much less mysterious.
Look at the Hour Hand First
The hour hand is generally the shorter hand. It moves slowly around the clock face and indicates the hour.
Suppose the short hand is pointing at 3. You know the hour is three. Easy enough.
But there is a slightly sneaky detail here: the hour hand does not always sit exactly on a number.
If the time is 3:20, the hour hand will have moved a little beyond 3 toward 4. So you should not automatically call it 4 just because it isn’t perfectly centered on 3.
When the hour hand is between two numbers, use the number it has already passed as the hour.
Find the Minute Hand
The minute hand is normally longer than the hour hand. To read the minutes, begin at the 12 o’clock position and move clockwise around the clock.
Each large number represents a five-minute interval:
- 12 represents 00 minutes.
- 1 represents 5 minutes.
- 2 represents 10 minutes.
- 3 represents 15 minutes.
- 4 represents 20 minutes.
- 5 represents 25 minutes.
- 6 represents 30 minutes.
- 7 represents 35 minutes.
- 8 represents 40 minutes.
- 9 represents 45 minutes.
- 10 represents 50 minutes.
- 11 represents 55 minutes.
So if the minute hand points to 4, the minutes are 20. If it points to 8, the minutes are 40. Once this pattern is familiar, reading the clock gets much quicker.
Count the Smaller Tick Marks
The larger numbers are useful, but the small tick marks allow you to find exact minutes.
Between two numbered positions, there are usually four smaller marks, creating five-minute sections. Each small step represents one minute for the minute hand.
If the minute hand is two small tick marks past the 4, the time is 22 minutes past the hour. That means the position represents 22 rather than simply 20.
This is one reason an interactive clock can be handy. You can move the hand by tiny amounts and watch how its position corresponds with the numerical time.
Combine the Hour and Minutes
Now bring the two pieces together.
If the hour hand has passed 3 and the minute hand is pointing to 4, the time is 3:20.
The colon in a digital display separates hours and minutes, but an analog clock doesn’t need a colon. The positions of the hands perform that job visually.
It sounds simple when explained this way, yet this combination is often the point where new learners need repeated practice. And that’s perfectly normal.
Check the Second Hand
Some analog clocks include a third hand, usually thin and moving more quickly. This is the second hand.
Each complete revolution of the second hand represents 60 seconds. The numbers on the clock can therefore also be understood as five-second positions:
- 12 = 0 seconds
- 1 = 5 seconds
- 2 = 10 seconds
- 3 = 15 seconds
- 6 = 30 seconds
- 9 = 45 seconds
The second hand isn’t always necessary when learning hours and minutes. It’s better to understand the hour and minute hands first, then bring seconds into the picture once the basic pattern feels comfortable.
Interactive Analog Clock Practice With Real Times
An effective way to use an Interactive Analog Clock is to practice familiar times rather than choosing random positions immediately.
Start with whole hours. Set 1:00, 4:00, 7:00, and 10:00. Notice how the hour hand sits directly on the corresponding number while the minute hand rests at 12.
Then introduce five-minute intervals. Try 2:05, 3:10, 5:25, and 8:40. These examples help connect clock numbers with minute values.
After that, try times such as 6:13 or 9:47. These are a bit less friendly, but they encourage the learner to use the small tick marks rather than relying only on the big numbers.
The important thing is not speed. If someone needs to count the marks slowly, let them count. Accuracy first, speed later.
Learning the Hour Hand When It Is Between Numbers
One of the most common difficulties in how to read an analog clock is recognizing the hour when the short hand is between numbers.
Imagine the clock shows 3:20. The hour hand has begun moving from 3 toward 4, because twenty minutes of the hour have already passed.
It hasn’t become 4 yet.
A helpful question is: Which number did the hour hand pass most recently?
If it has passed 3 but hasn’t reached 4, the hour is still 3. This tiny question can prevent a surprising number of mistakes.
Interactive practice is especially useful here because the learner can slowly move the minute hand from 12 to 6 and watch the hour hand gradually leave one number and approach the next. You can actually see why the answer changes only after the full hour has passed.
Understanding the Minute Hand Without Memorizing Everything
You don’t necessarily need to memorize twelve separate facts about the minute hand. Instead, understand the repeating five-minute pattern.
The clock face is divided into 60 minutes. There are 12 numbered positions. Sixty divided by twelve gives five, so each number corresponds to five minutes.
That’s the whole trick.
If the minute hand points to 7, think 7 × 5 = 35 minutes. If it points to 11, think 11 × 5 = 55 minutes.
For exact minutes, count the small tick marks after the nearest numbered position. A minute hand two marks beyond 7 therefore indicates 37 minutes.
It is a tiny piece of multiplication hiding inside an ordinary clock, which is kinda neat when you think about it.
Interactive Analog Clock Activities for Beginners
An interactive clock can turn ordinary practice into small challenges rather than repetitive drills.
Try setting a time and asking the learner to name it without looking at a digital display. Then reverse the activity: say “4:35” and ask the learner to move the hands into position.
Another useful exercise is the “one hand at a time” method. Set the hour first, then ask where the minute hand should go. Afterward, check the complete clock.
You can also deliberately set a wrong time and ask the learner to explain what is wrong. Maybe the minute hand says 25 minutes while the learner has called it 30. Asking them to find the error encourages understanding instead of simple guessing.
For younger learners, familiar daily times can make the exercise more meaningful. Breakfast time, school time, playtime, or bedtime can all become examples without turning the activity into a dull worksheet.
Interactive Analog Clock Games That Make Practice Less Boring
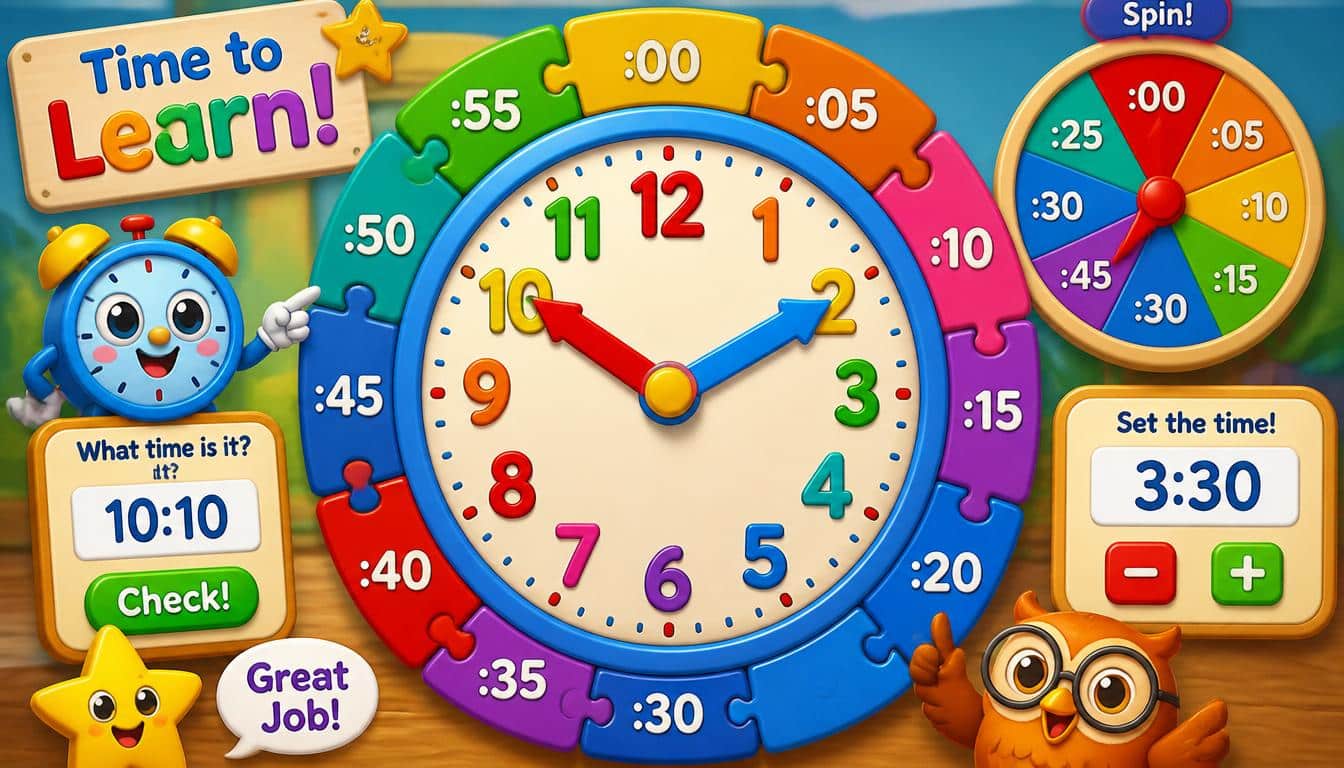
Practice doesn’t need to feel like practice every single time.
Try a quick guessing challenge: display a clock for a few seconds, hide it, and ask what time it showed. Another version is to give three possible answers and let the learner choose the correct one.
A “beat the clock” activity can also work, although the goal should be accurate reading rather than rushing. Set ten different times and see how many can be identified correctly.
For another game, say a digital time such as 7:45 and ask the learner to build it on the interactive clock. Then change it to 7:50 and ask what moved and why.
These small comparisons are powerful because they show that time isn’t a collection of disconnected answers. It is constantly moving.
Common Mistakes When Reading an Analog Clock
One frequent mistake is confusing the hour hand with the minute hand. Since the minute hand is usually longer, looking at length first can help, although clock designs vary.
Another common error is assuming that the number the minute hand points to is the minute itself. If the minute hand points to 5, the answer isn’t five minutes. It is 25 minutes.
Some learners also read the hour hand too literally. If the short hand is between 8 and 9, they may say 9. Instead, identify the hour it has already passed.
Then there’s the second hand. Because it moves quickly, it can attract attention and distract from the information actually needed. When learning hours and minutes, simply ignore it at first if necessary.
And yes, sometimes people just stare at the clock and somehow become more confused. That’s not a technical failure, it’s a very human learning moment.
Analog Time and Digital Time Together
Digital time and analog time show the same information in different ways.
A digital display might show 3:20, while an analog clock represents 3:20 through the relative positions of its hands.
Learning to move between these formats is useful because it strengthens time-reading skills from two directions. Given a digital time, you can construct the analog version. Given an analog clock, you can translate its hand positions into digital numbers.
For example, when the minute hand is on 4, think 20. If the hour hand has passed 3, combine those ideas and get 3:20.
The digital display gives you the answer in numerical form. The analog clock shows you how that answer exists in a circle of movement.
Using an Interactive Analog Clock for Independent Learning
One advantage of an interactive tool is that learners can practice without waiting for someone to create a new exercise each time.
A learner can choose a time, move the hands, check the result, and try again. If they make a mistake, the mistake is visible immediately.
Parents and teachers can also encourage explanation instead of simply asking for an answer. Rather than “What time is it?”, ask “How did you know?”
That second question reveals whether the learner understands the hour hand, minute hand, five-minute intervals, and tick marks, or whether they just guessed correctly.
A calm learning environment matters here. Telling time is a skill built through repetition, and repetition works much better when mistakes don’t feel embarrassing.
How to Practice Reading a Clock Step by Step
A simple progression can make practice easier.
Start with exact hours such as 2:00 or 9:00. Then move to five-minute intervals like 2:05 and 9:35. After that, introduce individual tick marks for times such as 2:07 or 9:38.
Once those feel comfortable, practice times where the hour hand is clearly between two numbers. Finally, mix everything together so the learner doesn’t know in advance which technique will be needed.
This progression works because each stage builds on the previous one. You’re not asking the learner to solve the entire puzzle on their first attempt, which would be a bit unfair.
Why Clock Hands Matter More Than Clock Numbers
At first glance, the numbers seem like the most important part of a clock. They’re familiar and easy to recognize.
But the real information is carried by the clock hands.
The hour hand tells you where you are within the twelve-hour cycle. The minute hand gives a more precise position within the hour. The second hand, when present, adds another layer of precision.
Their relationship also communicates something that a digital display doesn’t show quite as visibly: movement.
At 3:00, the hands have one arrangement. At 3:30, they have another. At 3:59, they are almost ready to form the arrangement associated with 4:00. An analog clock lets you watch the passage of time rather than merely read its current numerical result.
A Simple Method for Teaching Children How to Tell Time
When teaching a child, keep the explanation concrete.
First, identify the short hand as the hour hand. Next, identify the long hand as the minute hand. Then explain that each number around the clock represents five minutes when reading the minute hand.
Use physical or interactive movement whenever possible. Move the minute hand from 12 to 1 and say “five minutes.” Move it to 2 and say “ten minutes.” Continue until the relationship becomes familiar.
Then introduce the hour hand’s movement. Show what happens between 2:00 and 3:00 instead of merely explaining it verbally.
A learner may not understand the phrase “the hour hand moves gradually,” but watching it happen on a clock makes the idea much more obvious.
Creative Ways to Use an Interactive Analog Clock
You can turn everyday questions into tiny clock-reading exercises.
Ask what time lunch starts, then represent it on the clock. Ask what time someone normally wakes up. Set the clock five minutes later and ask what changed.
Another useful exercise is estimating. Show a clock and ask whether the time is closer to 2:00 or 3:00. This develops an understanding of the hour hand’s position before exact minute reading becomes automatic.
You can also practice backwards. Start with a time such as 5:40 and move the hands back ten minutes. The answer becomes 5:30. This introduces the idea that clocks don’t only tell us where we are; they can help us reason about where we were or where we’re going.
The Difference Between Seeing Time and Understanding Time
Being able to name a clock’s time is one skill. Understanding what that time means is another.
If someone reads 4:30 correctly, they have demonstrated clock-reading ability. But if they can also explain that 30 minutes have passed since 4:00, that 30 minutes
remain until 5:00, and that the hour hand has moved halfway toward 5, they have developed a deeper understanding.
An interactive analog clock supports both levels because it allows the learner to observe relationships, not just answers.
That’s perhaps its biggest value. It turns an abstract number into a visible position.
Practical Tips for Better Clock-Reading Skills
Keep practice sessions short enough that concentration doesn’t disappear halfway through. Five or ten focused minutes can be more useful than a long session filled with frustration.
Use different times instead of repeatedly practicing the same handful. Mix easy and difficult examples so the learner learns the method rather than memorizing positions.
Always identify which hand you’re reading before calculating. This simple habit reduces confusion.
And when an answer is wrong, go back to the clock rather than immediately giving the correct answer. Ask which number the minute hand passed, where the hour hand is sitting, or how many tick marks have been counted.
The goal isn’t merely to produce the right number. The goal is to make the reasoning feel natural.
How to Get the Most From an Interactive Analog Clock
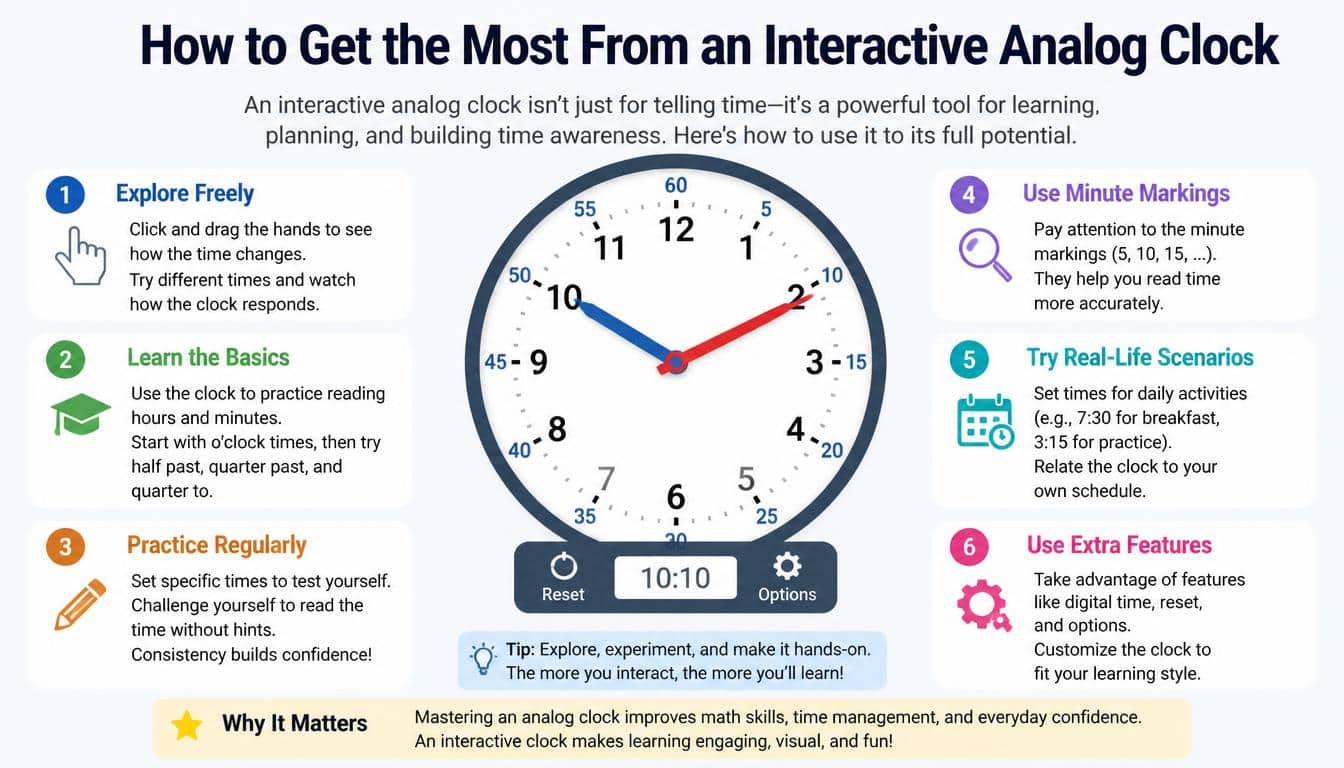
The best approach is active rather than passive. Don’t just look at the clock and wait for the answer to appear.
Set times yourself. Move one hand and predict what will happen. Pause the clock and identify the time. Change the minutes and watch the hour hand respond.
Try explaining every answer aloud, even if you’re practicing alone. Saying “the hour hand has passed 6, and the minute hand is on 7, so it is 6:35” forces the brain to connect each observation.
Eventually, the process becomes quicker. You stop consciously counting every mark and begin recognizing familiar positions almost automatically.
Frequently Asked Questions
Cclock w seconds
An analog clock with seconds includes a thin second hand that moves around the clock face. It helps you read the exact seconds along with the hours and minutes.
Analog clock hands
Analog clock hands show the time by pointing to different numbers on the clock face. The hour hand is shorter, the minute hand is longer, and the second hand is usually the thinnest.
Analog clock picture
An analog clock picture shows a traditional clock face with numbers and moving hands. It can help you understand how the hour, minute, and second hands indicate time.
Picture of an analog clock
A picture of an analog clock makes it easier to identify the clock face, numbers, and hands. You can use it to practice reading different times.
Analog clock interactive
An interactive analog clock lets you move or adjust the clock hands to set different times. It is a useful way to practice telling time and understand how each hand works.
How many minutes does each clock number represent?
Each numbered position represents five minutes when reading the minute hand. The sequence runs from 12 as 0 minutes, then 1 as 5 minutes, 2 as 10 minutes, and so on until 11 as 55 minutes.
Which hand shows the hour?
The shorter hand generally indicates the hour. Clock designs can vary, so it’s useful to check the clock’s design if the hands aren’t clearly different.
Which hand shows the minutes?
The longer hand generally shows minutes. Start counting from the 12 position, using five-minute intervals for each numbered position.
What does the second hand do?
The second hand measures seconds and usually completes one revolution every 60 seconds. It is commonly thinner and moves more quickly than the other hands.
Why is the hour hand between numbers?
Because the hour hand moves continuously. At 3:20, for instance, it has already moved beyond 3 but hasn’t reached 4 yet.
Can an interactive clock help with digital time?
Yes. A useful exercise is to switch between a digital time such as 3:20 and its corresponding analog hand positions. This helps learners connect the two formats.
Read More: https://gracethemes.com/what-time-is-15-hours-from-now/
Conclusion: Making Time Easier to See
An Interactive Analog Clock is more than a digital picture of a traditional timepiece. Used thoughtfully, it can turn telling time into something visible, movable, testable, and much less intimidating.
The essential process is simple: identify the hour hand, find the hour it has passed, read the minute hand using five-minute intervals,
count individual tick marks when necessary, and combine the information into a complete time. The second hand can then add another layer once the basics are comfortable.
If you’re learning how to read an analog clock, don’t worry about getting every answer right immediately. Move the hands, experiment with different times, notice what changes, and let the pattern become familiar. A clock is always moving, so your understanding can move along with it.
And perhaps that’s the nicest lesson hidden inside the clock face: time doesn’t demand that we understand everything at once. One minute follows another, one position follows another, and eventually the confusing circle starts making sense.
If you have a favorite way to practice telling time, or a clock-reading trick that finally made everything click for you, share it. Sometimes the simplest little explanation is the one that makes someone else say, “Ohhh, now I get it.”
