
How to Install Google Invisible ReCAPTCHA on Your WordPress Website

WordPress websites are regular targets for hackers and spammers. Maybe this is because the platform is very popular and powers a huge number of websites on the internet.
Thankfully, the creators of WordPress are not resting on their laurels when it comes to security.
As these unscrupulous individuals discover new methods of compromising websites, the good folks behind WordPress (and other talented individuals) implement security measures to counter them.
One such security measures is what’s commonly known as CAPTCHA (Completely Automated Public Turing test to tell Computers and Humans Apart), which is a smart solution that detects if the person trying to log into your website or place a comment is actually a human or a bot.
CAPTCHA typically works by generating a security question that can only be answered by a human, but because visitors are in a hurry to get the information they need from a website, having to solve CAPTCHA questions every time can be annoying. In some cases, it can even affect your website’s bounce rate.
This is where Google Invisible ReCAPTCHA comes in. Unlike the previous CAPTCHA versions, this works by identifying when the system suspects that the user is not human, hence the term ‘invisible’.
In this article, you’ll get to know how to install Google Invisible ReCAPTCHA on Your WordPress website. It won’t cost you anything and you’re only providing more security for your website and your users.
What you’ll get after installing the plugin
To show that installing the plugin will actually be worth your time, here are some of the features to expect when you install and activate it:
- Sign-up form protection
- Sign-in form protection against Brute Force attacks
- Comments spam protection
- Forgot / reset password form protection
- Review form protection for WooCommerce
- Support for third party plugin forms like Gravity Forms, Contact Form 7, BuddyPress, Ultra Community, etc.
- Custom form protection
Installing Google Invisible reCAPTCHA Plugin on a WordPress website involves a four step process:
Install Google Invisible reCAPTCHA Plugin
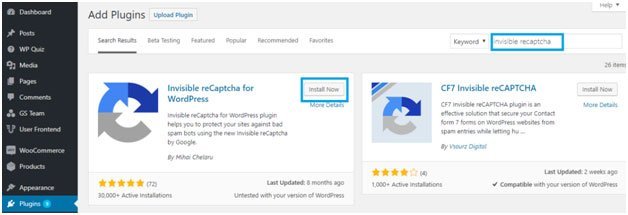
You will need to add the plugin just like you would any other WordPress plugin. This means logging in to your admin dashboard and navigating to Plugins, Add New, and then typing ‘Invisible reCAPTCHA’ in the plugin search box.
Once the result is displayed, you’ll need to first click on the ‘Install Now’ box inside the plugin search result. After a moment, ‘Install Now’ will change to ‘Activate’. You can now activate the plugin.
Once this process is complete, navigate to the settings in your WordPress Admin Dashboard, where you’ll see a new label, named ‘Invisible reCAPTCHA’. This is where you’ll go to configure the plugin before it can be fully functional.
Authenticate to Google account
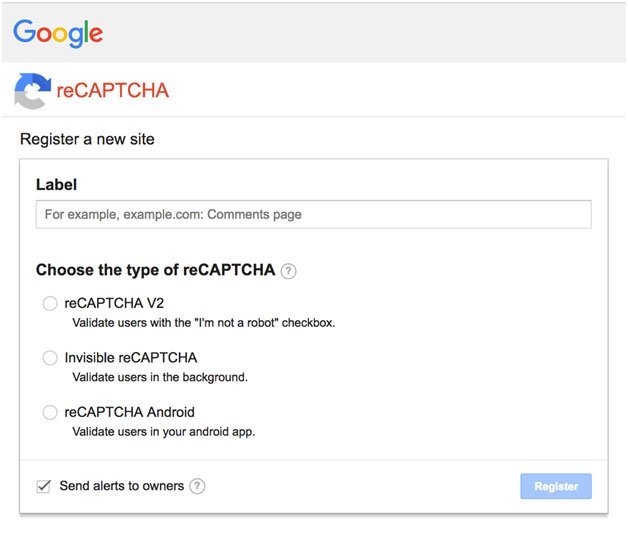
The invisible RECAPTCHA plugin is a product of Google; this means for it to function properly, you’ll first have to connect your website to a Google account. This is a straightforward process that simply involves completing the Google RECAPTCHA form.
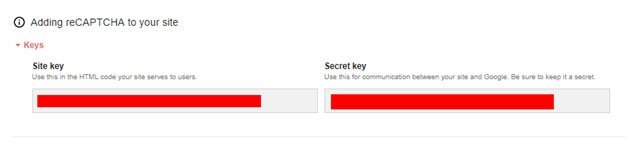
After completing the required information, you’ll be taken to a page where you’ll find the keys needed to run Invisible reCAPTCHA for WordPress on your website.
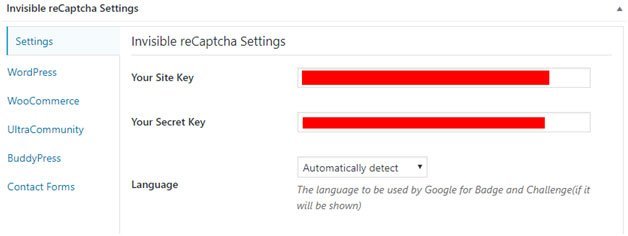
There are usually two keys to copy: the site key and secret key. You will have to copy and paste them into their individual boxes in Invisible reCAPTCHA for WordPress settings page on your WordPress admin.
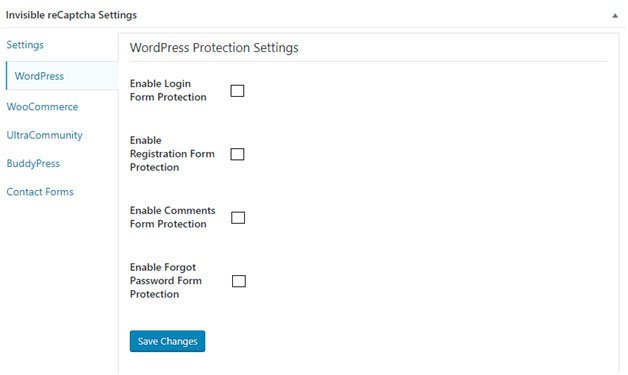
Choose your preferred settings
The beauty about Invisible reCAPTCHA for WordPress is that it allows you to choose exactly how you want the plugin to function.
Under the setting label in Invisible reCAPTCHA for WordPress, navigate to the different tabs that describe your website and the type of functions you require.
If you have any plugins that utilise forms on your website, you will find them listed there. Clicking on each name will allow you to choose the protection settings you want.
After installation
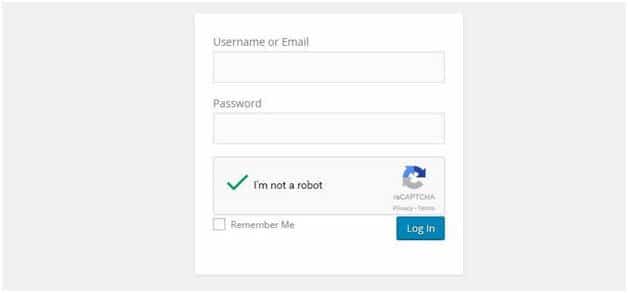
After selecting the protection you want, the next step is to find out if the plugin actually works on your website.
Firstly, log out of the admin dashboard on your WordPress website and go to the frontend of the site. If you follow the process correctly, you should be able to see the RECAPTCHA only on the pages and forms you selected.
If you prefer, you can hide the RECAPTCHA from showing up on the pages, but this may be breaking the terms and conditions of its use.
To do this, simply add the following line of codes to your theme’s CSS file or you can use a custom CSS plugin if you’d rather not meddle with the codes of your website.
.grecaptcha-badge {

display: none;

}
Final Words
Installing Google Invisible ReCAPTCHA on your WordPress website is a smart way to protect your site from spam, hackers and other malicious threats. Whether it’s your home page (say, www.discountdomains.co.nz), or a service page (www.discountdomains.co.nz/web-hosting, for instance), it’s important to ensure that no information can easily be accessed by just anyone on your site.
However, note that this isn’t the only way to keep your website secure. You should ensure all your plugins and themes are constantly updated and that you’re working with a web hosting provider that follows best practices when it comes to website security.
If you feel that your current host isn’t living up to your expectations security wise, you can research on top web hosting service providers in your area.
Hopefully, after reading this, you’ll be able to successfully integrate Google Invisible ReCAPTCHA on your WordPress website to provide that extra security for your login, sign up, comment and contact pages. This will prevent bots from gaining access to the important sections of your website.
If you happen to encounter any problem whilst installing or configuring this plugin, don’t hesitate to get in touch.