
One Click, One Job: A No-Nonsense Review of Image Inverter
I don’t usually write about single-purpose tools. Most of them try to be everything and end up being nothing. Image Inverter does the opposite. It does one thing, and it does it cleanly.
I spent an afternoon throwing different images at it: product photos, screenshots, film scans, meme templates. Some were 2 MB, some close to the 50 MB limit. None broke. None uploaded to a server. That last part matters more than you think.
This review is what I saw, what I tested, and where this tool actually fits in a real workflow.
Why a Dedicated Color Inverter Still Makes Sense
You can invert colors in Photoshop, GIMP, Canva, and half a dozen mobile apps. So why would anyone use a tiny web tool?
Speed and friction. When you only need a negative, launching a full editor is overkill. A 2026 comparison of online image tools found that single-function utilities load 3–5x faster than all-in-one editors for simple tasks.
Image Inverter leans into that. No timeline, no layers, no account. Just “give me the opposite colors, now.”
What This Tool Actually Does
At its core, Image Inverter flips every pixel to its mathematical opposite. Red becomes cyan. White becomes black. Bright areas turn dark, and dark areas turn bright.
The math is simple: each RGB channel becomes 255 − original value. That’s the classic photographic negative effect, applied digitally.
Unlike brightness or contrast tweaks, this doesn’t just lighten or darken. It mirrors tones around a midpoint and shifts hues to their complements.
First Impressions: Minimal on Purpose
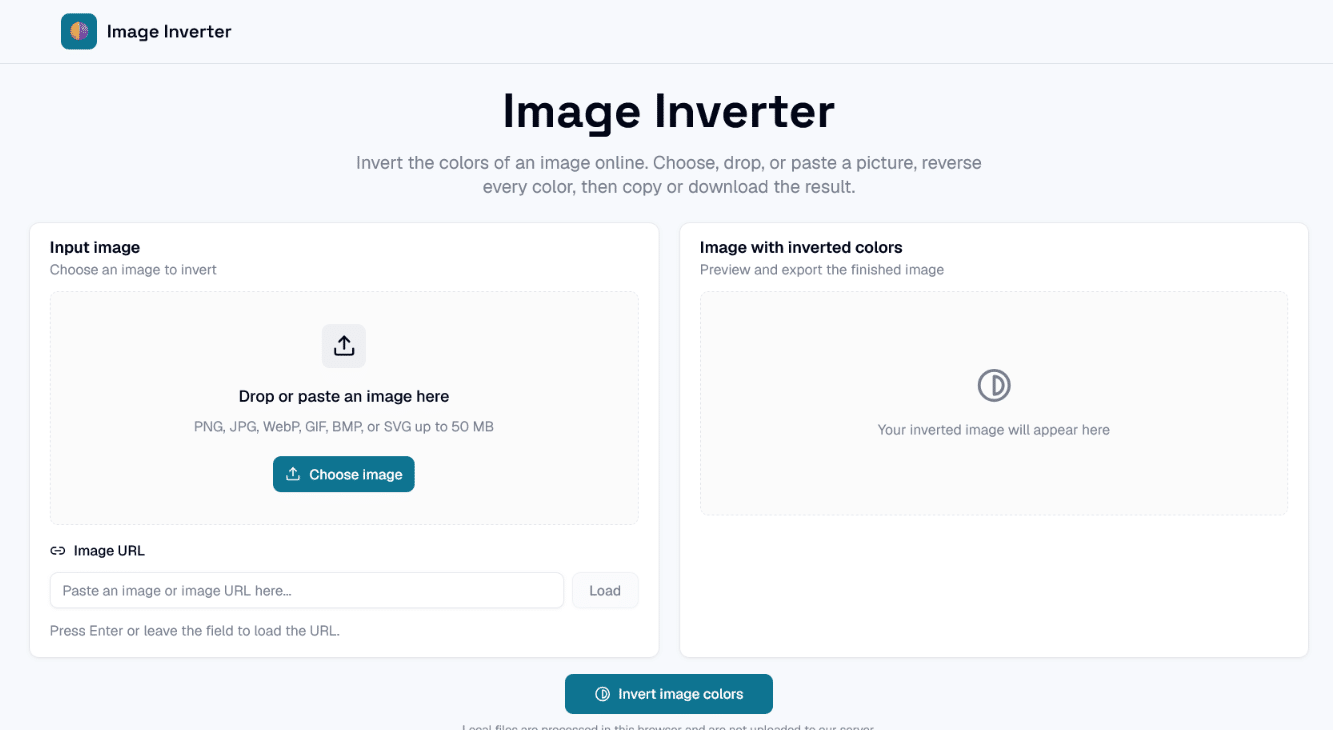
The landing page is blunt. There’s an upload area, a short description, and an “Invert Image” button. No popups. No “upgrade to pro” banners.
I dropped a 12 MB PNG of a street photo. The preview loaded instantly. I could zoom, pan, and check the image at actual size before inverting.
Everything runs in the browser. The site explicitly says local files are not uploaded to their server. For privacy-minded users, that’s a real feature, not a buzzword.
How I Used It: Three Quick Scenarios
-
Scenario 1: Checking Dark Mode Contrast
I’m building a simple landing page. My logo is black on white. I wanted to see how it might look in dark mode without opening Figma.
I uploaded the logo PNG, hit invert, and downloaded the result. Black turned white, white turned black, and the gray tones shifted predictably.
It’s not a full dark mode mockup. But it’s fast enough to decide “yes, this direction is worth exploring” before handing off to design.
-
Scenario 2: Film Negative Experiments
I scanned an old 35mm negative as a positive by mistake. Instead of re-scanning, I tried Image Inverter as a quick fix.
The color shift looked like a real film negative: reds went cyan, skies went orange, skin tones went eerie. It’s not a replacement for proper film workflows, but it’s perfect for a quick preview or a stylized graphic.
-
Scenario 3: Meme and Thumbnail Variants
I run a small YouTube channel. Sometimes I need a “spooky” or “glitchy” version of a thumbnail.
I inverted a portrait, then brought the result into my editor for extra grading. The base negative saved me 10–15 minutes of manual adjustments. For a free tool with no login, that’s a solid trade.
Features That Actually Matter
-
Local Processing and Privacy
Every pixel is processed in your browser. No upload, no server queue, no “we may use your images for training” fine print. In 2026, that’s rarer than it should be.
For sensitive work (client assets, internal screenshots, personal photos), this is a genuine advantage over server-based converters.
-
Input Flexibility
You can choose a file, drag and drop, paste from clipboard, or enter an image URL. I tested all four.
Clipboard paste was the most useful. Screenshot → paste → invert → download. No intermediate save. That’s the kind of tiny workflow win that adds up.
-
Output Options and Quality
The tool lets you download in PNG, JPG, BMP, or WebP, depending on your browser. I tested PNG and JPG.
No visible compression artifacts on PNG. JPG quality matched the source at similar settings. Dimensions and transparency stayed intact.
There’s no slider for “inversion intensity.” It’s all or nothing. That’s a limitation, but also a clarity choice.
Where It Falls Short
-
No Partial or Selective Inversion
You can’t invert only shadows, only highlights, or only one color channel. It’s full RGB inversion, every time.
If you need luminosity-only inversion or per-channel toggles, other specialized tools offer that. Image Inverter doesn’t try to compete there.
-
No Batch Mode
One image at a time. If you have 50 photos to invert, you’ll be clicking a lot.
For occasional use, it’s fine. For batch workflows, a desktop app or script is still the better choice.
-
No Advanced Controls
No intensity slider, no threshold, no blend modes. Just “invert” and “download.”
That’s the point of the tool, but it also defines the ceiling. If you want creative control, you’ll need a fuller editor.
Who Actually Benefits From This
-
Designers Who Need Fast Color Studies
If you regularly test opposite-color directions, Image Inverter is a handy first step. It’s faster than opening a heavy app for a single check. Use it to validate an idea, then move the result into your main project.
-
Photographers Exploring Negative Looks
Portrait and landscape shooters can use this to preview film-negative aesthetics. It’s not a full grading suite, but it’s a solid starting point.
-
Teachers, Students, and Curious Humans
The clear before-and-after workflow is great for explaining RGB, complementary colors, and digital image processing.
Show the same image normal and inverted. Ask: “What changed? Why does red become cyan?” That’s a 10-minute lesson in color theory.
-
Content Creators on a Deadline
Thumbnails, social posts, short-form graphics. Sometimes you just need a weird, eye-catching variant fast.
Image Inverter gives you that without watermarks, signups, or format headaches.aitoolly+1
Why Simple Tools Like This Matter in 2026
The web is full of bloated “AI everything” apps. They’re impressive, but they’re also slow and confusing for simple tasks.
A focused utility like Image Inverter is the opposite. It solves one problem, quickly and privately. In a world of 200-feature suites, that’s refreshing.
Industry tests in 2026 show that single-purpose tools often win on speed and clarity for narrow jobs. This fits that pattern exactly.anything+1
Final Verdict: Small Tool, Clear Role
Image Inverter is not trying to be your main editor. It’s a surgical instrument. Use it when you need a negative, fast and clean.
It won’t replace Photoshop or GIMP. It doesn’t try to. But for its narrow job, it’s one of the least annoying tools I’ve used this year.
If you value speed, privacy, and zero friction, Image Inverter deserves a bookmark.
