
New to WordPress? Read this 5 Simple Guide on How to Create a WordPress Blog

Anyone is welcome to create a blog. Whether you are an FBA Amazon seller hoping to increase your sales on Amazon or an avid reader wanting to share a book review, creating a blog website is something you need to try right away.
Fortunately, there are several platforms you can use for free, like WordPress. Established in 2003, this content management system gives users the platform to create a blog or website. Even though creating a website from scratch seems daunting, it becomes simple with WordPress because of its user-friendly process and interface.
In this 5-step guide, you will learn the process and some tips on setting up and creating a WordPress website or blog customized to your needs and purpose.
Step 1: Choose a web hosting plan
Before you can start using WordPress, you need to decide what kind of website you want to create so that you can choose the right platform, web hosting provider, and plan. For example, if you plan on creating a small, personal website, it would be best to use a shared hosting plan offered by WordPress or other hosts. This is also inexpensive and user-friendly, making it practical for beginners.
But if you intend to make a larger, more complex website, you may need a more powerful hosting plan. In this case, choosing a managed WordPress hosting or a dedicated server hosting plan would be best for you. By using these, you can have more control over your website in terms of customizing your interface and adding plugins.
Step 2: Set your website’s domain name
Deciding on a domain name for your WordPress website blog is an important step. Because it is how people will find your blog on the internet, you must ensure that it’s easy to remember and reflects your site’s content. You can use a business name generator to explore creative and relevant domain name ideas that align with your blog’s niche.
If you use your WordPress site for personal blogs, consider including your name and the type of content you will share. For example, if you blog about gardening, you might want to include the word “garden” in your domain name. But if your website is for your business, just use your business name.
Also, avoid using hyphens or numbers in your domain name because these can be difficult for some people to remember and make your domain name look spammy. And once you have selected a domain name, you can check out and purchase it on your chosen hosting provider.
Step 3: Install free WordPress blog software
After finishing the first two steps, you can now install and configure the WordPress blog software. If you have a different hosting service provider, they offer a one-click installation process to make installing the software easier.
Afterward, navigate to your URL and log in to your WordPress account. Enter your email address and password to set up your hosting account. And after signing in, you can finally access the WordPress Admin Dashboard. There, you can begin tweaking your settings, customizing your website according to your theme and content, and writing your blogs.
Step 4: Customize your chosen WordPress theme
Making a logo is not the only creative task you need to accomplish if you want to make your website attractive, easy to navigate, and showcase the content you will share. Fortunately, when you use WordPress, you don’t have to start from scratch—you can modify an existing theme to suit your brand or content better.
With some creativity and coding knowledge, you can change the colors, fonts, layouts, and more to provide a pleasing browsing experience for your visitors. But if you don’t have much coding experience, you can still take advantage of the free WordPress themes.
To change your theme, go to Appearance found on your Dashboard and select Themes. You can browse thousands of pre-made themes with various styles and layouts. But you can also use the search bar to find a specific theme or color.
After choosing your desired theme, click Activate. If you like to customize it further, go to the Edit site and tweak the website appearance and layout as needed. But consider contacting professional web designers if you need assistance to provide the best experience to your visitors or buyers.
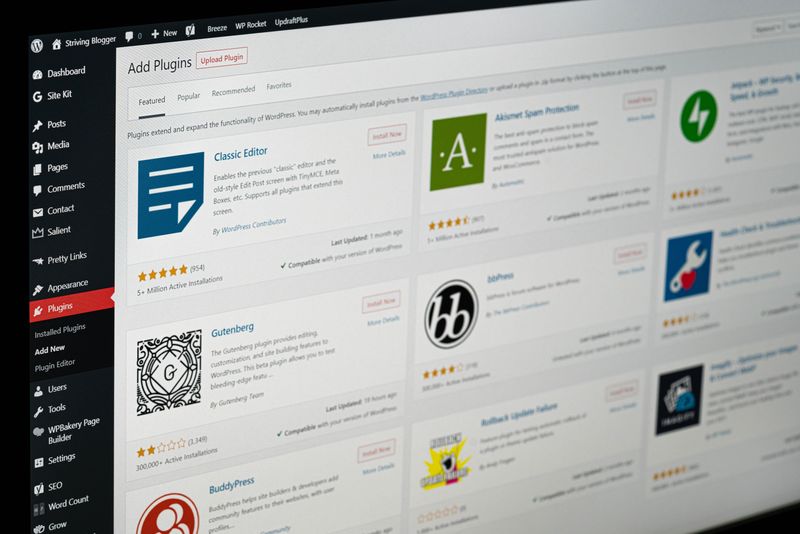
Step 5: Download some recommended plugins
Even though WordPress already provides numerous helpful features for website building, you would need additional features that can only be accessed by installing plugins. Therefore, you must consider installing WordPress plugins dedicated to website editing, widgets, live chat support, spam protection, and security plugins.
Website editors and builders are essential for customizing your site and individual blog pages if you think the standard settings are insufficient. Meanwhile, widgets and live chat support plugins can help you convert visitors into customers. Lastly, WordPress security and spam protection plugins protect your website and all data enclosed in it as well as block spammy or harmful comments.
Key Takeaways
In conclusion, you must accomplish various steps first before making your WordPress website or blog. These steps include choosing a web hosting plan, selecting a domain name, and installing the WordPress software. Furthermore, you have to customize your chosen theme and download some crucial plugins. By setting up your website beforehand, you can ensure your visitors’ smooth and pleasing browsing, reading, or shopping experience.