
How to Use WooCommerce with Stripe

WooCommerce is a free open-source plugin that adds functionality to your online store.
As we know that WordPress is a flexible platform and in a few clicks, your website can turn into a fully-functional WordPress e-commerce online store. You do not need to hire a Web developer for creating a website.
It currently powers over 93.7% of WordPress websites globally. It has hundreds of available extensions with some incredible features. WooCommerce is extremely easy to configure, and it is very stable, as well as comfortable to expand and improve.
WooCommerce provides two platforms PayPal and Stripe. Stripe for WooCommerce provides a complete online-payments platform to help you to grow your business. Today Stripe offers services in 40+ countries.
Stripe focuses on providing the technical base, protection against fraud, and banking infrastructure necessary for online payment systems.
The most significant benefit of using Stripe is that we do not need to store any confidential customer data on servers. Stripe handles all the payment details securely.
Why Use the Stripe Payment Plugin?
There are numerous reasons to use the stripe plugin are listed below:
- Stripe accepts all the payments like credit or debit cards as well as a simple payment method.
- It helps your users to enter the payment information quickly and correctly at checkout.
- Stripe can be easily optimized from apple pay, google pay, and payment request API support.
- This payment plugin detects the threats with the help of stripe radar and optional 3d security.
- Stripe helps to capture authorizations and process refunds from your WooCommerce Dashboard easily.
In this article, we will review the different steps to use WooCommerce with Stripe.
Using a WooCommerce with Stripe
Stripe is one of the most popular WooCommerce payment gateways, offering flexibility and a seamless payment experience for online stores. Many of the world’s most innovative technology companies rely on Stripe to scale their businesses efficiently and handle transactions securely.
Setup for Stripe is effortless and quick; you don’t need to deal with a file transfer or leave your web browser.
Here is a step-by-step guide to install the Stripe payment gateway parameters.
Let’s commence!!
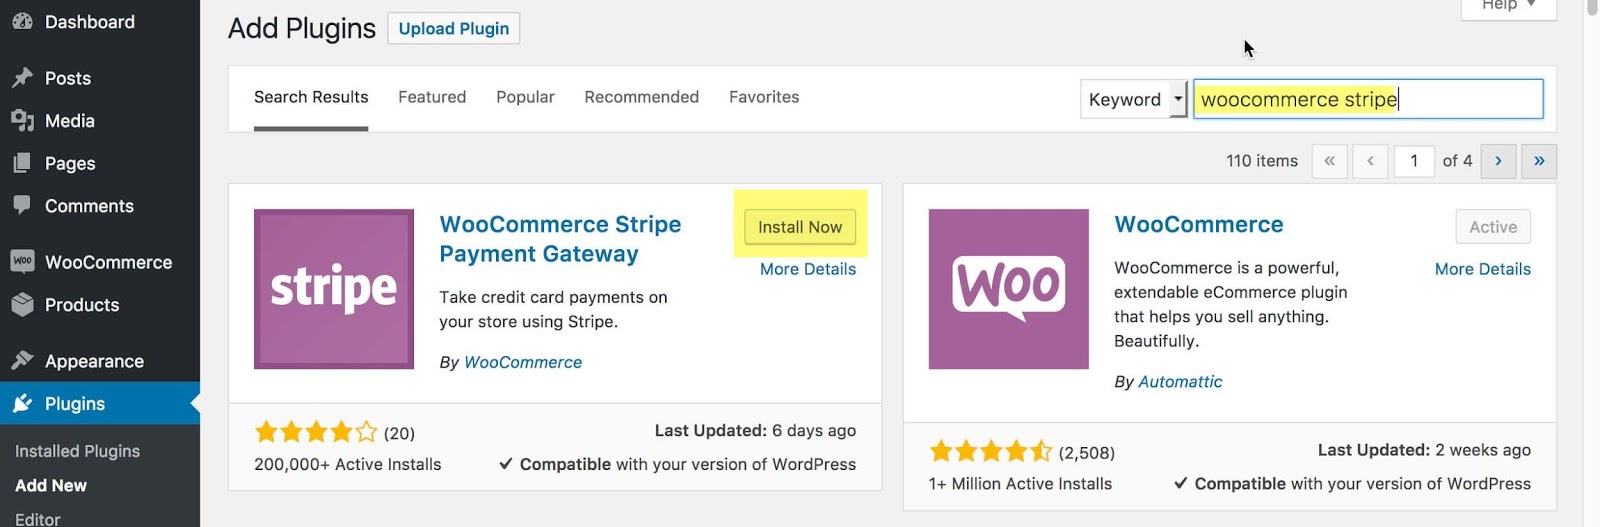
Step1: Installation of stripe payment gateway plugin
The first and foremost step is to log in to your WordPress as a website administrator. Go to the dashboard of your site,→ click on the plugins→ then, add ‘New’, find a WooCommerce stripe payment gateway.
Click on the install the plugin and activate it once more.
When first activated, the Stripe payment method will be enabled. Tick the Enable Stripe checkbox to disable.
Step 2: Create the Account for Stripe
The next important step is to create the stripe account for your payment option. It’s quite easy to create your Stripe account. The Signup process is easy and seamless.
If your customers are paying in your store with their credit card then all transactions will be managed by Stripe easily. Payments automatically added to your Stripe account immediately.

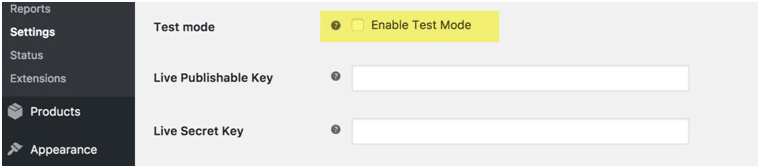
Tick the Enable Test Mode checkbox, before going live. Untick to begin accepting payments with Stripe.
Step 3: Install the Statement Descriptor
After entering the title, description, turn on the test mode, then enter the secret key publishable key. The Secret Key and Publishable Key are different and should only be used when Enable Test Mode.
The next important step is to Enter the statement descriptor→and it will display the information on the client’s card.
The descriptor cannot be left blank and can be up to 22 characters. The statement of description must contain at least one letter, may not include these characters > < "'. Also, only alpha-numeric characters can be used.

Step 4: Stripe Checkout
After turning on the stripe checkout process. Click on the form language setting to “Auto”. The form of language will change accordingly for users from different countries.
Since we have a multilingual WordPress website, we also have an additional string translation setting available. Enable the feature of Bitcoin and Apple Pay payments with the Stripe
Step 5: Activate Payment
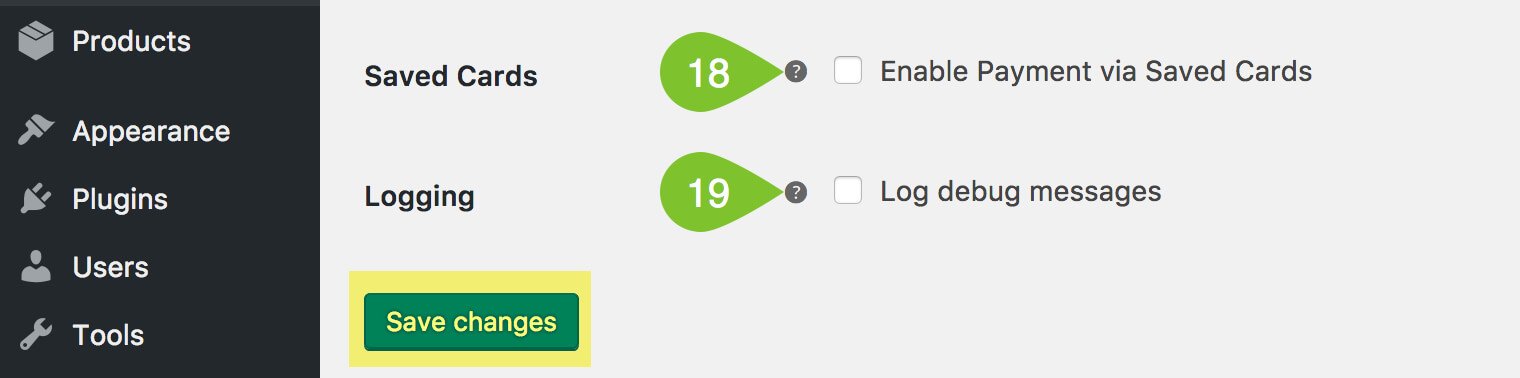
Activate the payment via saved cards. This will let your customers reuse the same bank card in your online store. Stripe servers keep the information of bank card numbers.
Payment Request Button will change the appearance of the button to show. The Request Button Height will change the height of the button and match your styling preferences.
The type will change the type of button to show.
- Default – “Pay” (default Apple or Google button)
- Buy – “Buy Now” (Apple or Google variant)
- Donate – “Donate” (Apple or Google variant)
Enable the debug message. Do not forget to save your changes!
Step 6: Check the WooCommerce with Stripe
We suggest you test your Stripe Payment Gateway before using different payment methods you have included.
Visit the front page of your store and add a demo product to the cart. Go to the cart and go on with the checkout. You can process a test transaction using test credentials shown on the screen.
Step 7: Check your Payment Store Alive
After testing, return to Dashboard —> WooCommerce —> Checkout —>Stripe and check the enable test Mode button.
You will need to enter your live publishable key and secret key.
Once it is completed, your WooCommerce site with Stripe Payment Gateway will be ready to sell anything without any limitations.
Final Thoughts
Above, we have mentioned different steps to use the WooCommerce website with the Stripe payment gateway plugin.
WordPress is a good beginning for those who want to start an eCommerce site. To hire a web developer is an expensive task. By using the WooCommerce plugin and Stripe integration, you are assuring secure and reliable transactions and proper management of the sales.
So now that you know how to install it, always make sure that you optimize and secure your new eCommerce site to give your users the best experience.
Hopefully, this would be very beneficial for your business.
We would love to hear your questions and suggestions.
Feel free to ask in the comment section
Thank you for reading!!