A Beginner’s Overview of the WordPress Admin Panel and ToolBar

If you own a WordPress website, you’ve likely faced many challenges behind the scenes to ensure your website has everything it takes to meet user expectations.
For old hands at WordPress, these activities are simple enough. However, for those who are new to WordPress and yet to access the back-end of their website, this article will certainly prove helpful.
WordPress is a great website building platform and has a powerful admin interface (or back-end) that makes completing administrative tasks very easy.
From this end, you can handle everything related to your website – from what visitors see at the front-end, to what search engines see when they visit your site.
-
The WordPress Admin Panel
When logging in to your WordPress admin, you’ll land at the backend or WordPress dashboard section of your website. This is called the WordPress Admin Panel.
From here, you can address the different settings that make up your website, add new posts and pages, install themes and change the look and feel of your website, as well as install plugins that would extend or add new functions.
By default, only a few tools or menus are displayed on the admin panel. However, as you add more plugins or addons, these become part of the admin panel and appear where you can easily access them.
The dashboard (where you land when logging in) shows information about your website, such as the number of posts and pages, website statistics or number of visits, the currently activated theme, as well as the version of WordPress you’re using.
Clicking on any of these can show you more details about the mechanism in question or allow you to change how it functions.

-
Features of WordPress Admin Panel
As stated earlier, on a fresh WordPress installation, you‘ll see very few tools on the admin panel. However, as your site grows and you install more plugins, add-ons and themes, you’ll see links to where you can change features of these new installations on your admin panel.
Here are some items you can expect to see when logging in to the admin panel of your WordPress website:
- Admin Menu: The admin area leads to different parts of the back-end, where you can perform functions that affect how your website works. To access these areas, you’ll need to use the admin menu, which is the main navigation area of your WordPress back-end. Here, you can choose a menu or submenu that will lead you to a specific page.
- Content Area: This is where the admin data of your WordPress back-end is displayed. For instance, if you click ‘Plugin’ on the admin menu, this will lead you to the content page, that shows all the installed plugins (and related details about each of them). Only data that relates to that particular page is shown. However, the admin bar at the top of the page, the information at the footer of the page and the admin menu or main navigation bar remain the same.
- Screen Options: Screen Options is where you’ll visit to show or hide additional functions that affect various pages. Some of the page functions in WordPress Admin Panel are set to ‘Hide’, so if you can’t find what you need, go to ‘Screen Options’ to see if that particular function is hidden from view. You can then set it to ‘Show’.
- Help: If you’re having problems with any part of WordPress admin, go to this link to access the ‘WordPress Documentation’ or ‘Help’ pages.
- Dashboard Widgets: This are widgets on the dashboard that display useful content. You can move these widgets about or remove them completely. However, they can be useful for showing information that you need to see.
- Welcome Widget: For first time users, the Welcome Widget shows useful information such as WordPress version, current stats and helpful suggestions with regards the next step to take with your WordPress installation. You can simply hide it by clicking ‘Dismiss’.
-
The WordPress Toolbar
The WordPress toolbar is a recent addition to the back-end. It was added in WordPress version 3.1 and allows you to easily move from the admin panel (back-end) to your live website (front-end) without having to log out and log back in.
The toolbar formerly called ‘Admin Bar’ is a full horizontal bar at the top of the WordPress screen, which is only visible to logged-in users. It contains shortcuts for different functions or areas of the website, such as where to create a new post (‘Post’ and ‘Page’ for admin), where to edit profile and where to log out.
At the top left hand side, you will see the WordPress logo, while in the top right hand side (close to the logout button), you will see a gravatar that represents the user.
Formerly designed to be visible only for admin, the WordPress toolbar is visible to all logged-in users, although the functions are different for ordinary website users and administrators. Users can decide to display or hide the toolbar on the website’s front-end by going to their profile and un-checking the toolbar option box.
Each item on the WordPress toolbar has its own function, although these are determined by the assigned role of a logged-in user.
For instance, a logged-in administrator will be able to add a new page or edit an old one, while a standard user will can create a new post, but have no access to website pages.
As explained earlier , the WordPress toolbar contains (amongst other things) a small WordPress logo in the top right corner of the screen.
Clicking on this logo takes you to the welcome page, where you’ll see details of your WordPress installation, such as WordPress version, current theme and website statistics. Moving your cursor over this icon will display sub menus that lead to various WordPress websites.
On the toolbar, you can also see if your WordPress installation has a pending update. This update notice covers everything about your website, including the WordPress core files, themes and plugins.
From here, you can choose to update all at once, or one at a time. To be on the safe side, it’s important to backup your website before initiating any updates.
At the other end of the toolbar, you’ll see your username and a link to your profile, where you can update your details as necessary. Beside this feature is the logout button.
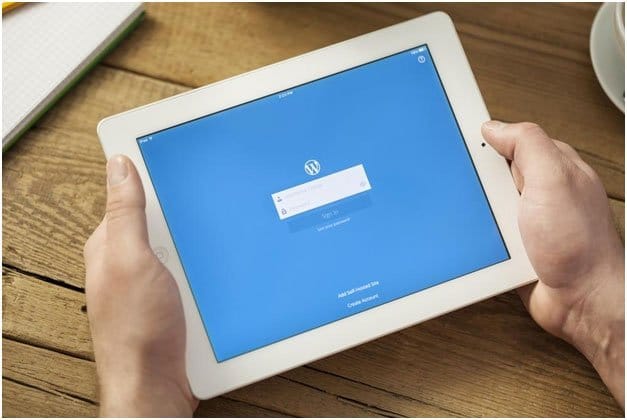
At the end of your session in the admin panel, clicking on ‘logout’ will take you back to the screen where you’re asked to provide your username and password.
Conclusion
Hopefully, this article will help you understand the difference between the WordPress Admin Panel and the WordPress toolbar. From these two areas, you can create a WordPress website that you will be proud of.
Naturally, the first step in creating such a website is to choose the right domain name that appropriately represents your brand. If you’re just starting out and don’t have one yet, you can search for reliable companies who offer domain names 4 less than the regular cost. Once you have the domain name you want, you’ve taken the first step in creating a really unique website.


