How to add a Registration Form to WooCommerce Stores
As an online store owner, there are a number of benefits of letting prospects and customers register with your site.
By creating an account, your customers won’t have to enter their billing information every time they want to make a purchase. It also lets you deliver a personalized shopping experience to each customer based on their purchase and browsing history.
In this post, we’ll walk you through how to add a user registration form to your WooCommerce store. We’ll explore two different methods – configuring WooCommerce and using a plugin solution – and share some pro tips that you can use to fine-tune the registration process.
Let’s get started.
How to Add a User Registration Form to Any WooCommerce Store (2 Methods Explored)
Adding a user registration form to your WooCommerce store lets you collect information (such as names and email addresses) from both prospects and customers. You can use this information to deliver personalized shopping experiences, build an email list, and offer special discounts.
Here, we’ll explore two different ways of adding a user registration form to WooCommerce.
Method 1: Use the WooCommerce Account Page as a Registration and Login Form
Here’s what your online store’s My account page should look like before you add a registration form to it:
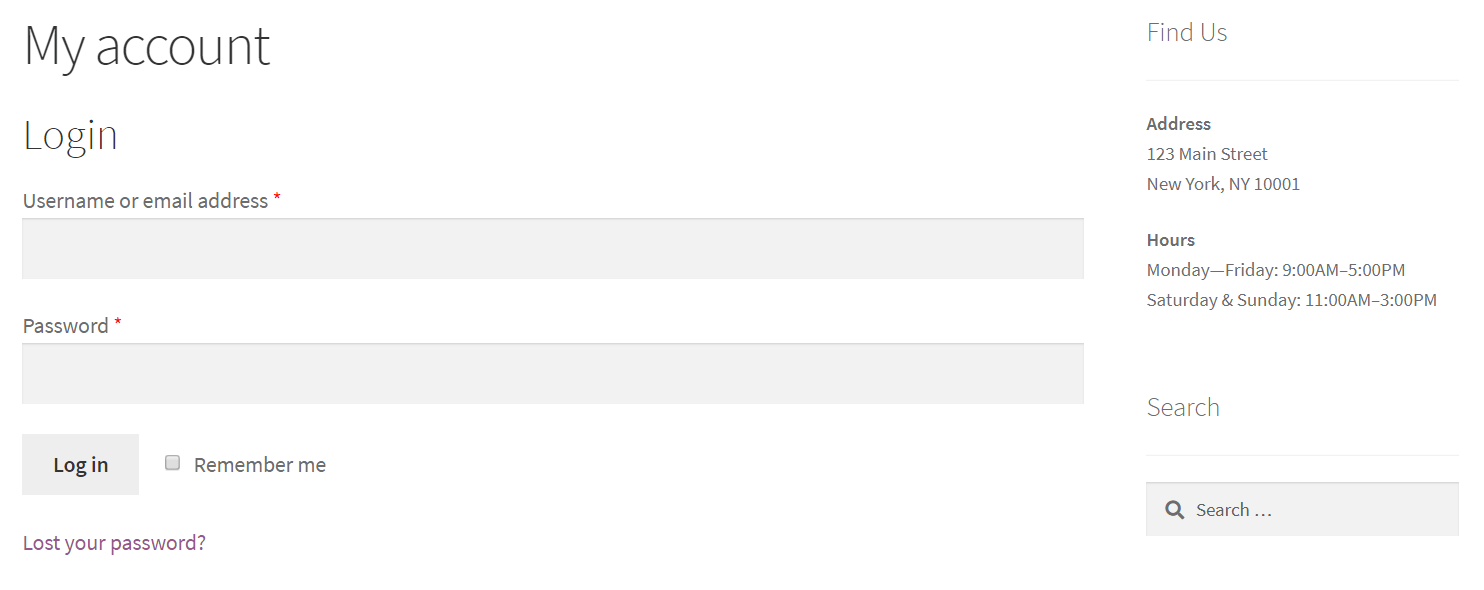
Log in to your WordPress admin panel and head over to WooCommerce > Settings from the admin panel and click on the Accounts & Privacy tab.
Next, tick the Allow customers to create an account on the “My account” page option under the Account creation section and click the Save changes button to proceed.

Your WooCommerce store’s My account page should look something like this now:
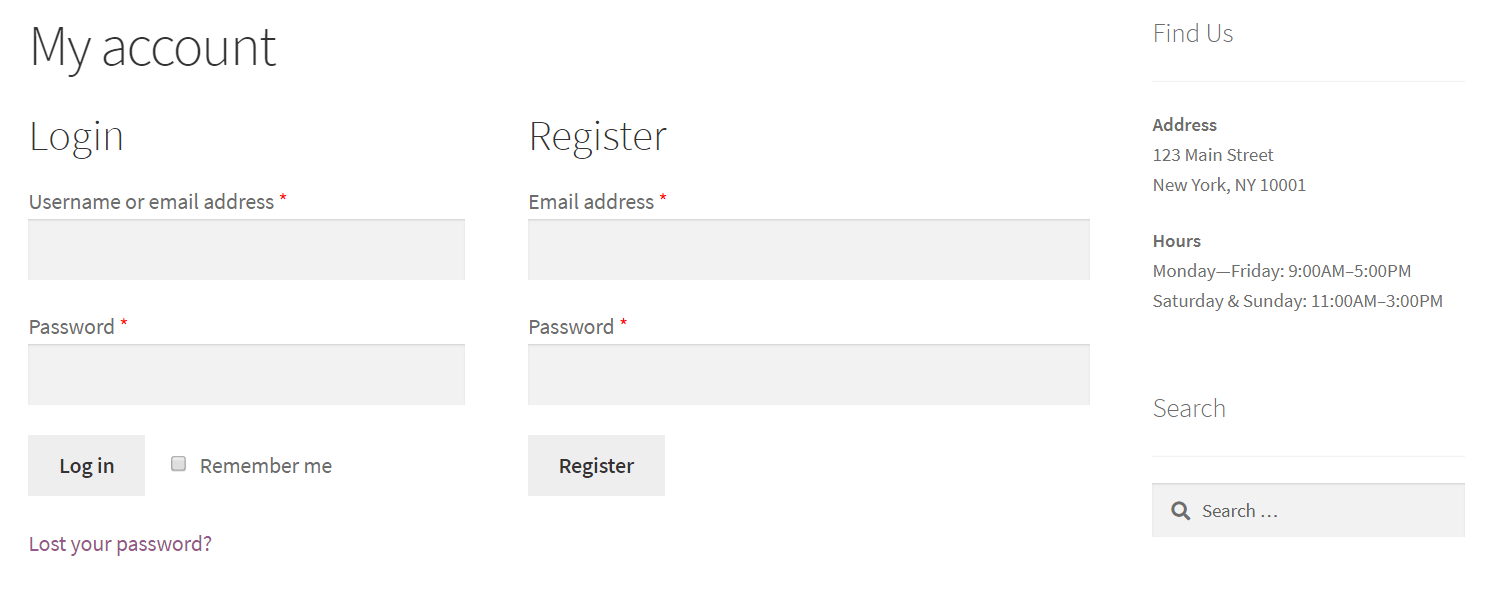
Method 2: Use the Free Theme My Login Plugin to Create a Registration Form
If you’d like to create a custom registration form for your online store then we recommend using the free Theme My Login plugin. Here’s how:
Log in to your WordPress admin panel and navigate to Plugins > Add New from the admin panel. Search for Theme My Login and install and activate the plugin on your website.
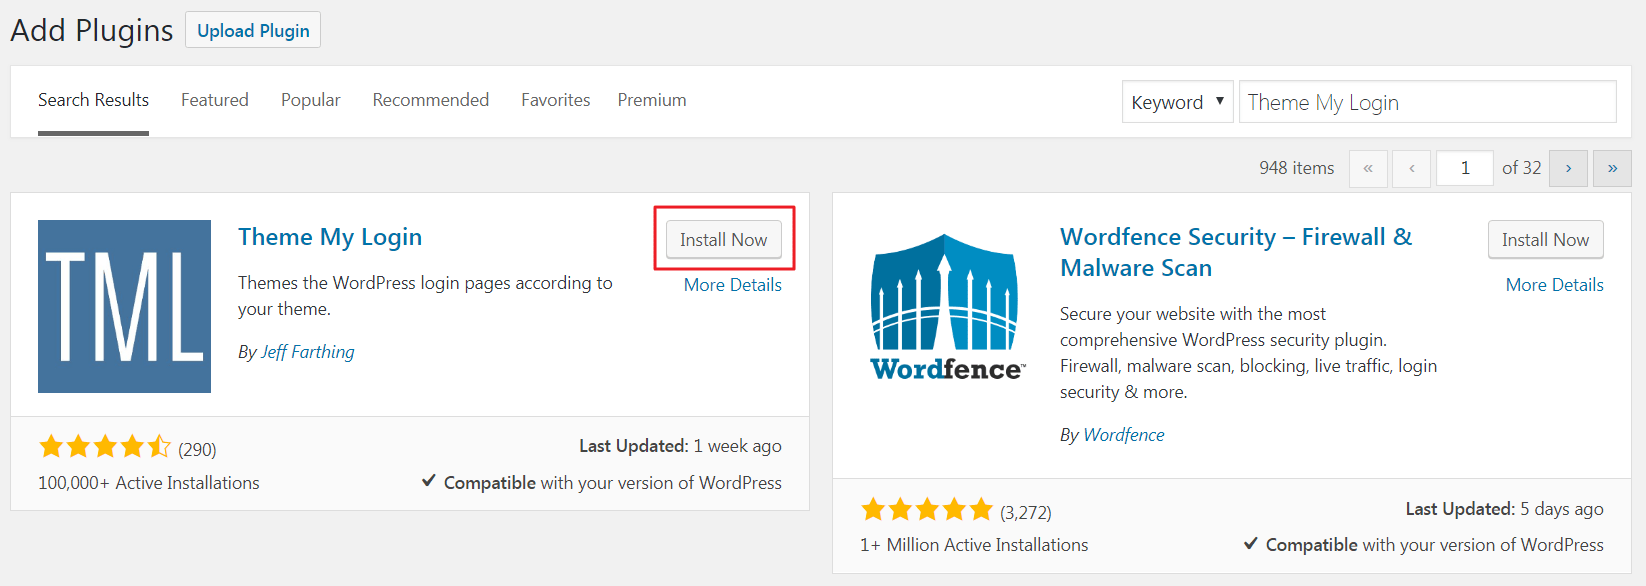
Next, head over to Settings > General, scroll down to the Membership option, and tick the Anyone can register box.

The plugin will automatically add a new Register page to your website. It should look something like this on the front-end:
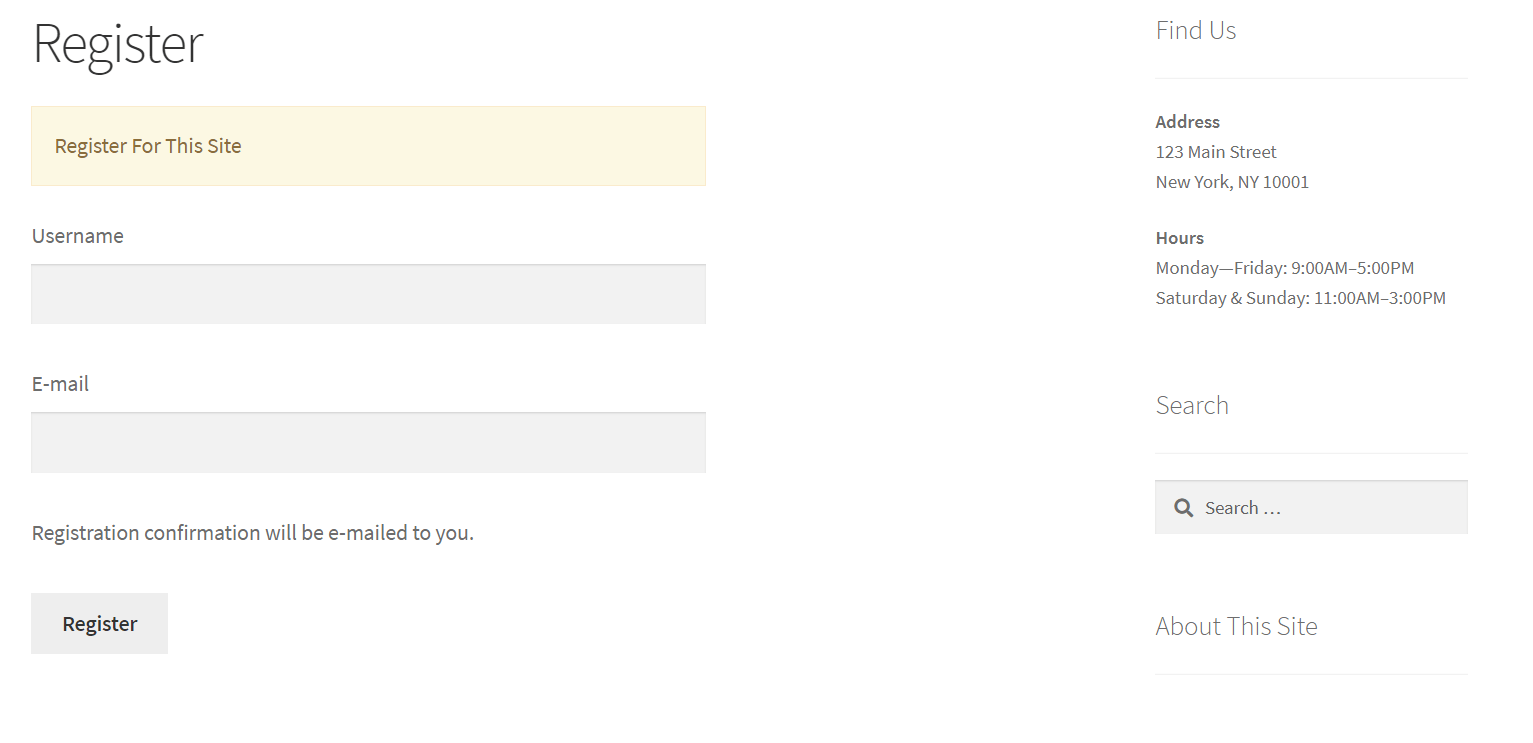
That’s all there is to it! Follow the above steps and you will have a fully-functional WooCommerce user registration form that allows prospects and customers to register with your online store.
3 Bonus Tips to Supercharge Your Registration Process
By now you should have a clear understanding of how to add a user registration form to your WooCommerce store. Next, I’ll reveal how to take things to the next level and fine-tune your registration process.
Tip #1: Only Registered Users Can Purchase
If you’d like to configure your WooCommerce store to only allow registered users to make purchases then all you have to do is integrate your registration form into your checkout process. Here’s how:
From your WordPress admin panel, head over to WooCommerce > Settings and click on the Accounts & Privacy tab.

- Under the Guest checkout option, make sure the Allow customers to place orders without an account box is un-ticked and the Allow customers to log into an existing account during checkout box is ticked.
- Next, under the Account creation option, make sure the Allow customers to create an account during checkout box is ticked.
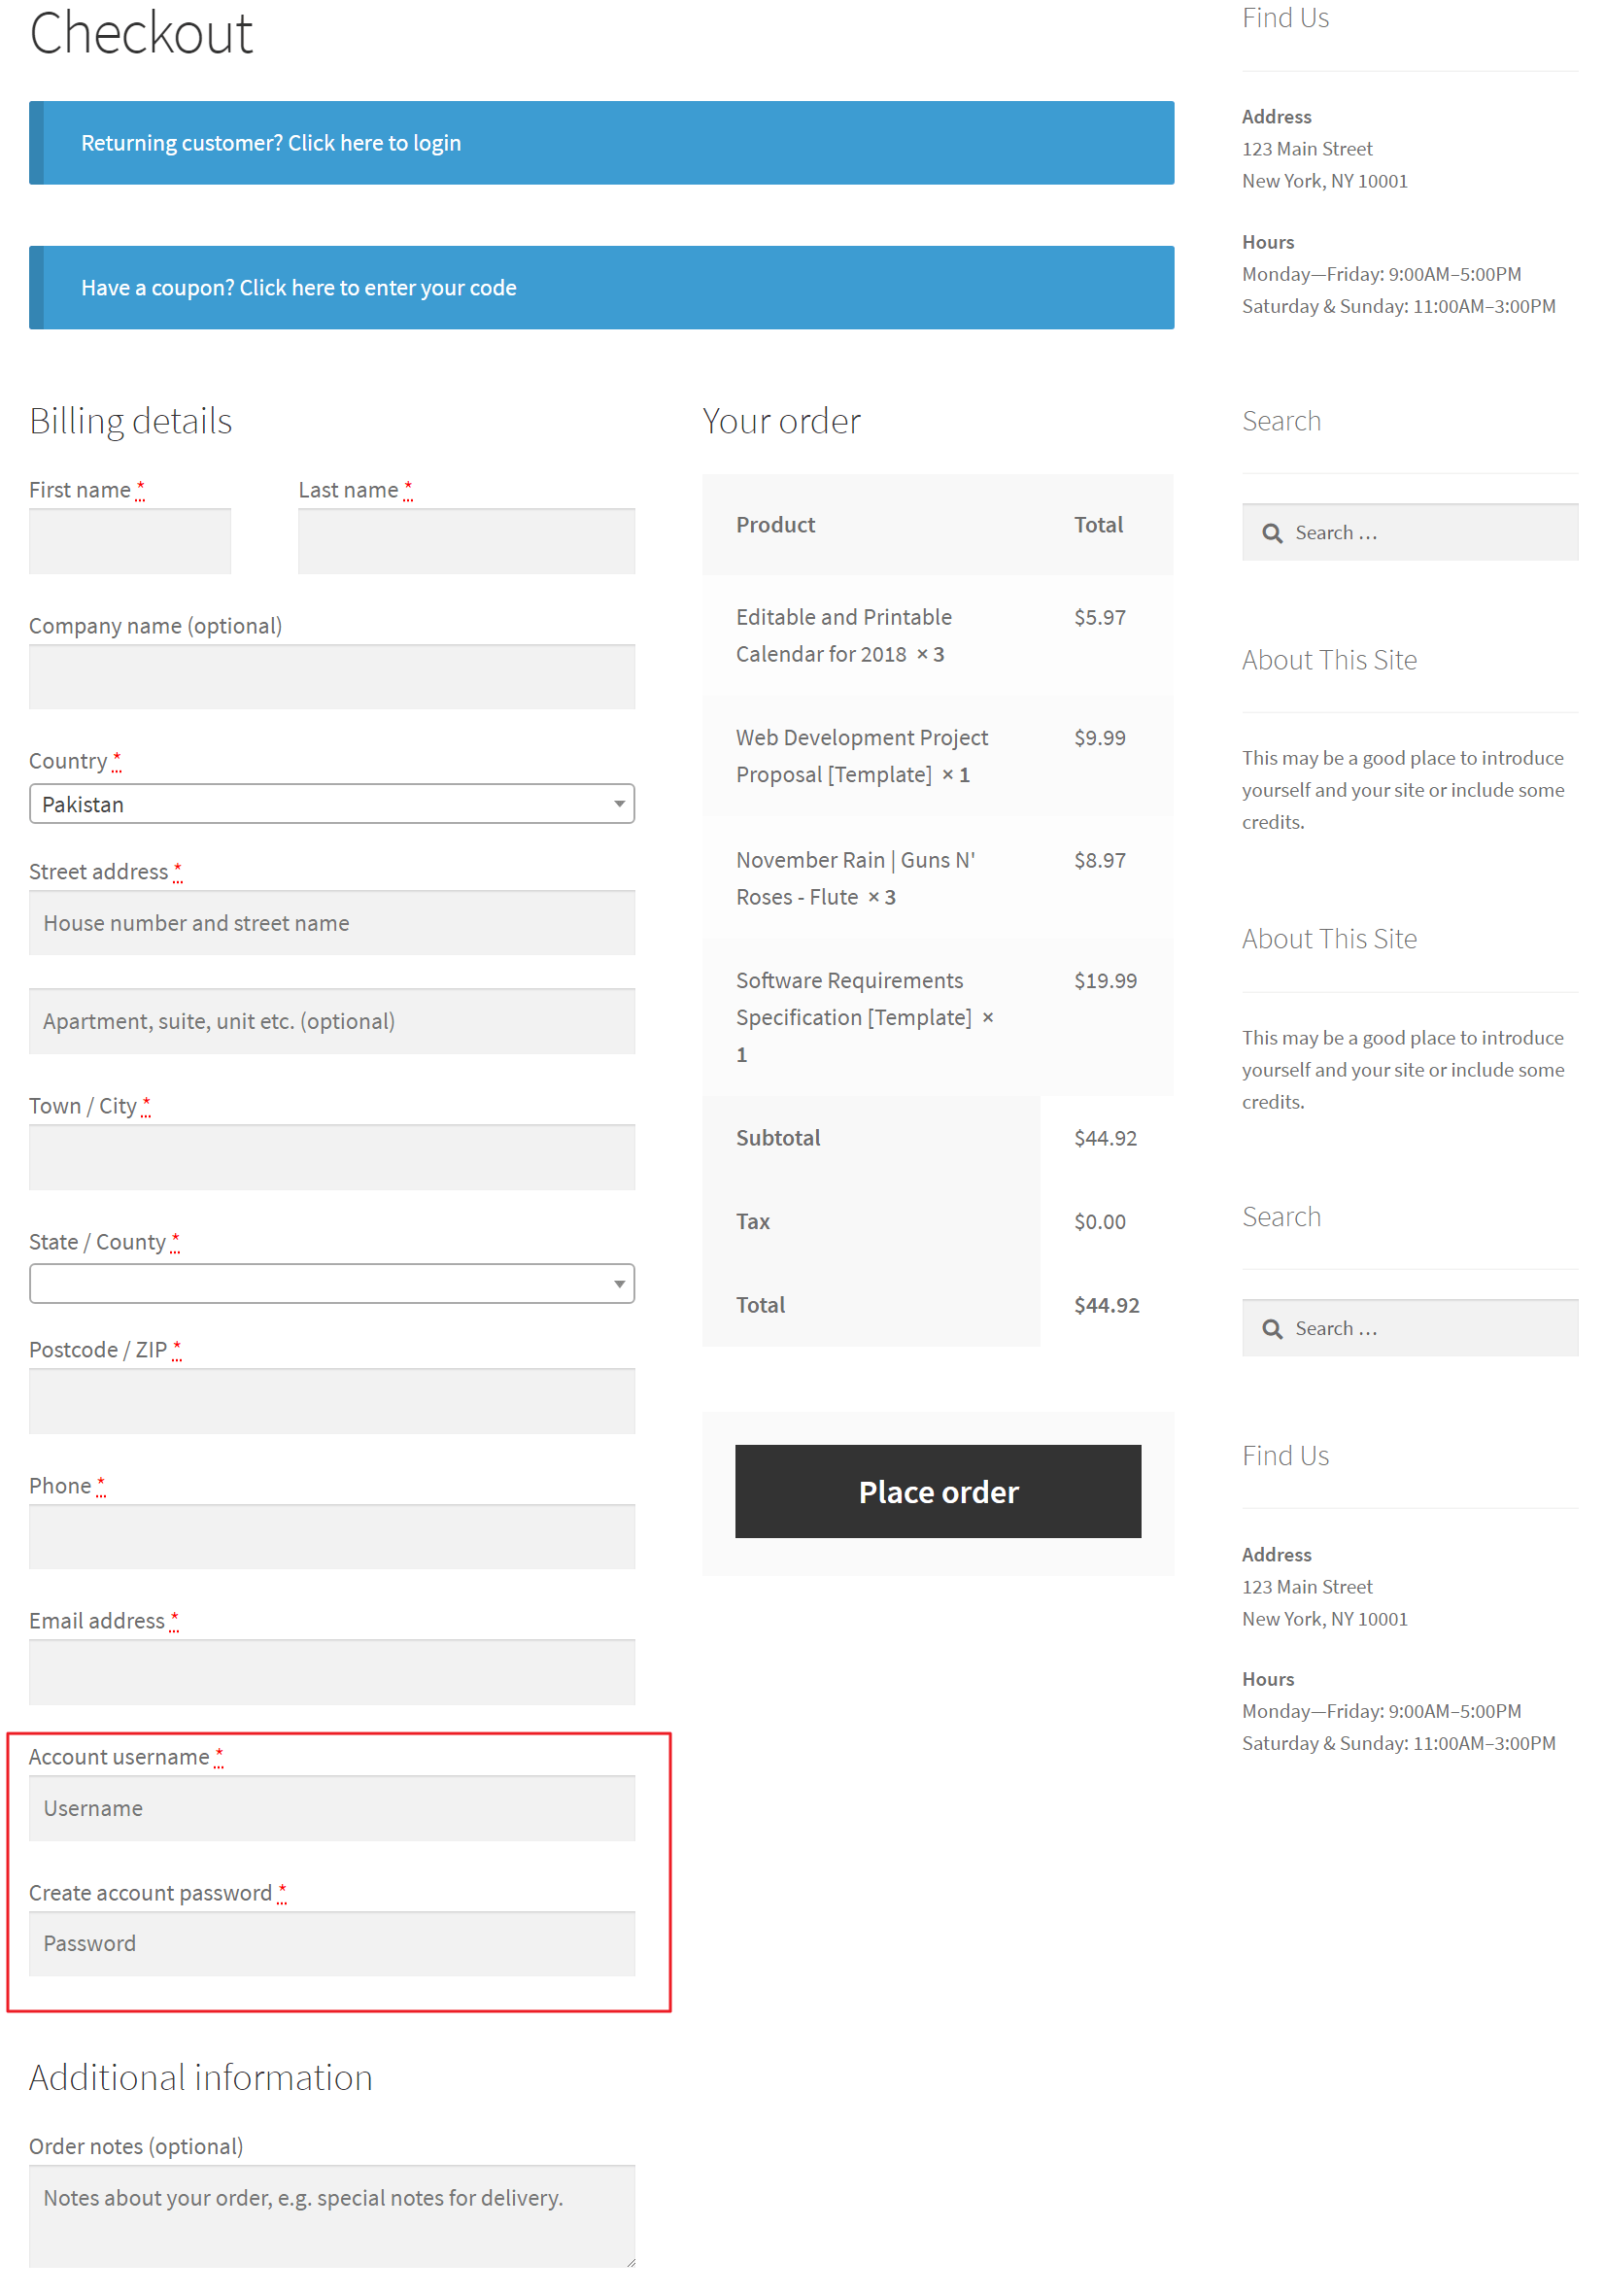
Your checkout page should look something like this:
Tip #2: Hide Online Store From Public View
You can hide your WooCommerce store from public view so that people can only access and buy your products after they’ve registered and logged into their accounts. Here’s how:
- Once you have the WooCommerce Private Store plugin installed and activated to your website, add your license key to the settings page by heading over to WooCommerce > Settings > Products > Private Store.
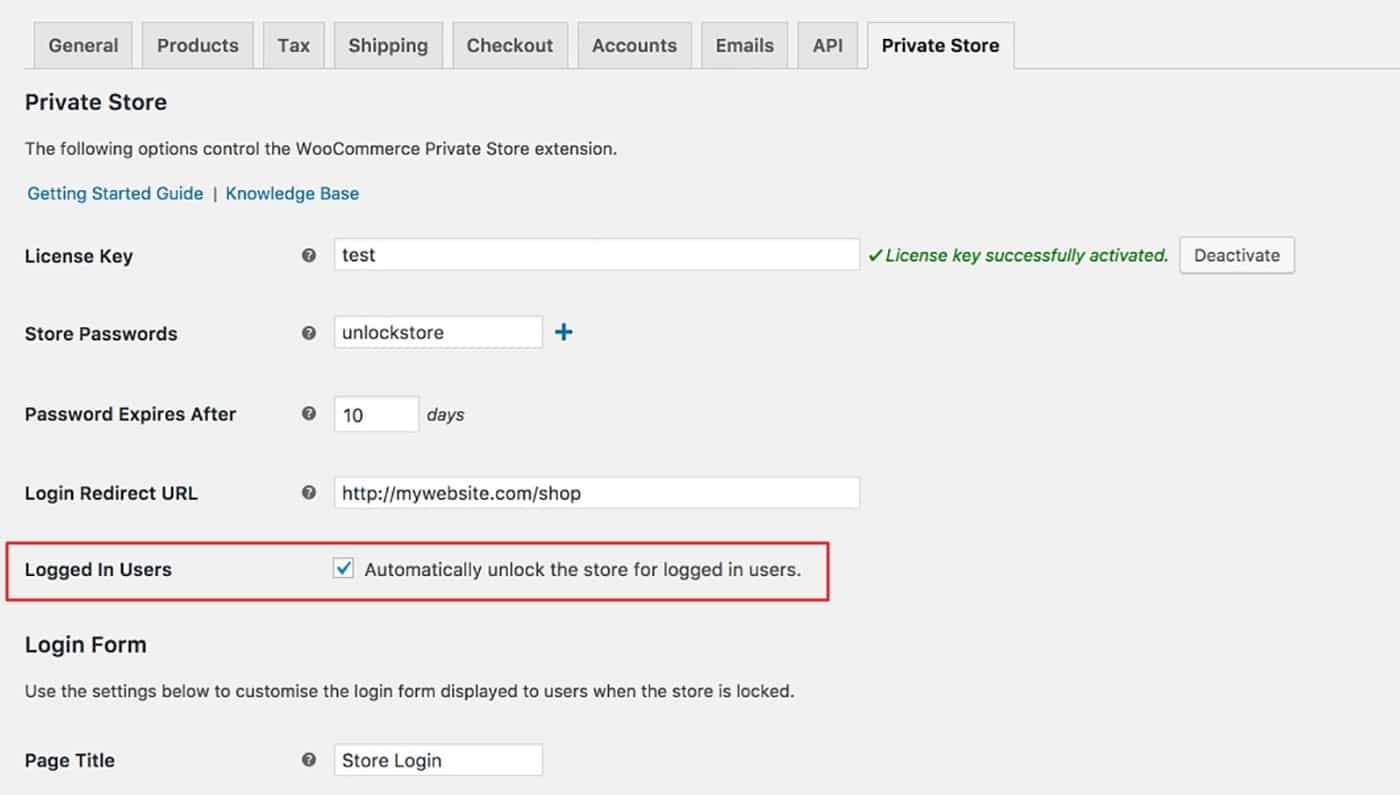
- Under the Logged In Users option, make sure the Automatically unlock the store for logged in users. box is ticked.
That’s it! Your entire WooCommerce store will only be accessible by registered users who’ve logged in to their accounts.
(Note: This tip only works with Method 2 above, because the WooCommerce Private Store plugin will hide the built-in WooCommerce ‘Account’ page. Instead, it works perfectly with registration forms created with the free Theme My Login plugin.)
Tip #3: Hold New Registrations for Moderation
With the Theme My Login plugin, you can configure your WooCommerce store to hold new user registrations for moderation. Here’s how:
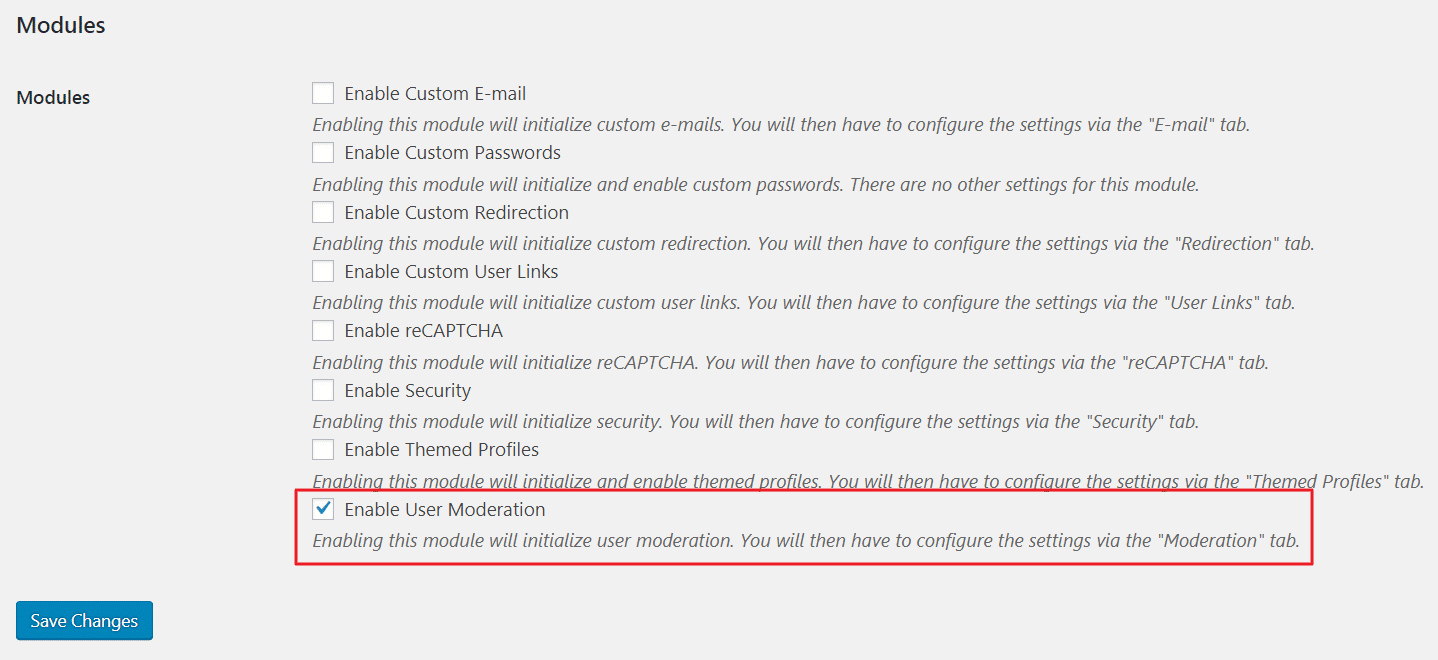
- From your WordPress admin panel, click on the TML item in the sidebar menu. Next, scroll down to the Modules section and tick the Enable User Moderation box under the Modules option.
- Navigate to TML > Moderation and select the Admin Approval option under Moderation Type.

You can moderate new user registration through the Users > All Users screen.

Conclusion
Adding a user registration form to your WooCommerce store can help you deliver a better user experience and give you an opportunity to build your email list, send newsletters, and offer special discounts.
We’ve showed you two different ways of adding a user registration form to your WooCommerce store’s front-end. By now, you will be in a good position to allow users to register. This saves them having to re-enter their information every time they make a purchase, helping to build customer loyalty and build your sales over time.
Katie Keith Author
Katie Keith is Operations Director and Co-Founder of Barn2 Media, a UK-based WordPress company. She runs the company with her husband. Having built WordPress websites for clients since 2009, they transitioned to selling plugins in 2016 and have never looked back. They specialize selling plugins for hiding and protecting content within WordPress and WooCommerce. When she’s not working, Katie loves hiking on the English coastline.

