
3 Simple Ways to Change Your WordPress Username

If you’re reading this, there’s every chance you’ve tried to change your WordPress username, only to find that you can’t do so via the admin area.
Maybe in the rush to get your WordPress website up and running, you hit the wrong key on your keyword, leaving you stuck with a meaningless word as your username.
Perhaps you couldn’t make up your mind during installation and decided to use anything in the hope that you would be able to change it further down the line, but you’re now stuck with a goofy username.
Whatever the reasons, WordPress (possibly for security purposes) doesn’t offer many options for changing the admin username. In fact, it’s impossible to do so via the expected channel. So, what can be done?
The purpose of this article is to show you three simple techniques to employ should you need to change your WordPress admin username.
Let’s get started…
Creating a new username
This is the simplest method for changing your WordPress account username. It involves creating a new username, giving it admin privileges and deleting the old one.
Here goes:
You’ll first need to login to your WordPress admin area. This means using your original (goofy) username and your password to log in to the WP admin dashboard.
Once you log in to the dashboard, go to the admin menu on the left hand of the window and place your mouse over ‘Users’, then click on ‘Add Users’. A new user registration form will open where you will then need to enter the relevant information.
Note that you’ll need to use a different email address, as the system won’t accept the one currently in the database.
When you get to the role section, choose ‘Administrator’ and then click on ‘Add New User’ to submit the information to the database.
Once the new user registration has been accepted and confirmed (most likely by clicking on the link in the confirmation email sent to you), you will need to log out of the current account completely.
Now, log back in using the credentials for the new admin account you’ve just created.
After logging in, go to ‘Users’, then ‘All users’. A page will then open where you’ll find a list of all the users on your WordPress website. Look for your old admin username in the list and subsequently delete your old admin account.
Note that after you click on ‘Delete’, WordPress will ask to know what you intend to do with the content created by the old admin.
You have two options: firstly, you can choose to completely delete all the content that was created by the user. To do so, click on ‘Delete All Content’.
Alternatively, you can opt to assign all the content created by the user to a new account. For instance, you can transfer ownership to the new admin account.
To do so, click on ‘Attribute All Content to’: then select the username from the dropdown box. Now, you can click on ‘Confirm Delete’.
If you fail to attribute all content to the new admin account, you’ll lose all the content you created when you had the other username. However, by attributing, everything belonging to the other account now belongs to the new account, upon deletion.
Using a plugin

The beautiful thing about WordPress is that there is a plugin for almost everything. If you’ve used a WordPress website – even for a very short time – you’ll know that plugins are small files of code that are used to extend the functionality of your website.
You can use a particular plugin to give your WordPress website just about any feature. Fortunately, there is also a plugin that can be used to change your WordPress username.
Using a plugin is a straightforward and easy process that requires little or no technical skills. One of the most popular plugins used to change the admin username is Username Changer, although there are many others that are equally effective.
You’ll need to log in to your WordPress admin area using your original username and password. After this, you’ll need to install the username changer plugin or any other of your choice.
If you don’t know how to install a plugin, we suggest that you read this article on plugins first.
Once you’ve installed and activated the plugin, navigate to ‘Users’, then ‘Your Profile’ in the admin menu. Your profile page will then open up, where you’ll find an option to ‘Change Username’, which was not there originally.
Click on the ‘Change Username’ option to arrive at the page where you can enter the username of your choice, then click ‘Save’. You’ll be required to log out and log back in – but this time around with the new username.
Using phpMyAdmin
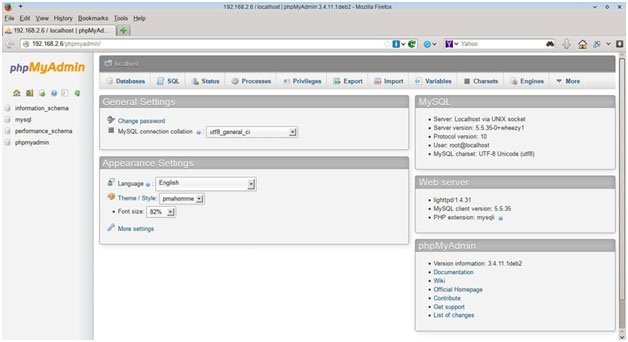
Using phpMyAdmin (located in the control panel area of your website) is a more complex process. James at Domains4Less, New Zealand’s top hosting provider, suggests that you should access this area only if you know exactly what you’re doing, as the slightest mistake can crash your website. It’s also a good idea to backup your WordPress website before proceeding.
The first thing you’ll do is log in to the control panel of your website. For some hosting companies, this is a cPanel manager. For others, use control panels that are similar.
Once you’re logged in to the control panel, look for the ‘phpMyAdmin’ tab and click on it. The window will load to a page where you can locate your databases. Look for the database that’s tied to your WordPress website.
By default, WordPress databases tables start with a wp_ prefix, unless you changed it during installation. Look for ‘wp_users’ on the left hand side of the window.
Click on it to open up the table containing the details of users on your website. You will see an edit link in front of each user. Click on ‘Edit’ in respect of your username.
A new window will then open, in which you’ll need to click inside the ‘user_login value’. Then, change the content to the username you want to adopt.
You can then save the file. It’s better to change your password from the WordPress Admin area, as the password field in phpMyAdmin is made up of MD5 hash.
Conclusion
You’ll no doubt agree that by using the above three steps, you can easily change your WordPress admin username. However, I recommend the first two options unless you are an advanced WordPress user and know exactly what you’re doing.
Good luck!