How to Fix 403 Forbidden Error in WordPress
While trying to open your WordPress site this morning did you see the 403 Forbidden error?
If yes, don’t worry as it’s a widespread WordPress error.
In this article, I’ll show you three methods that will solve the issue in minutes. So, are you ready to take the task in your hands?
Let’s get started!
What is 403 Forbidden WordPress Error?
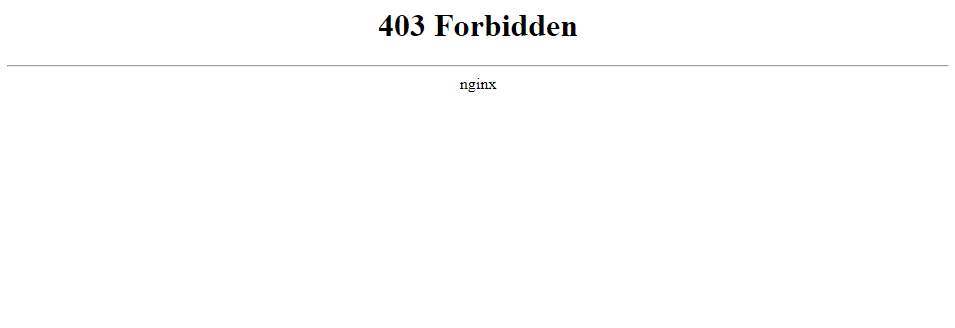
This is what you’ll see when you get this WordPress error:
“403 Forbidden – You don’t have permission to access ‘/’ on this server.
Moreover, a 403 Forbidden error emerges while trying to use an Error Document to handle the request.”
You can encounter this error in different scenarios.
- While site migration from live server to a local host server
- After installing WordPress
- While visiting any page on your WordPress website
- When you create a new article and update the old ones
That’s all you need to know about the 403 WordPress error.
What Can Cause the 403 Forbidden Error?
Well, there are several reasons for you to get the 403 forbidden error in WordPress. The most common issue is the improper configuration of your security plugin.
A majority of the times, security plugins can block an IP address if they consider it to be a virus.
Apart from this, there are other reasons like corrupt .htaccess file or problem with file permissions. Also, if your hosting provider has changed some server settings it might result in the 403 error.
How to Fix Forbidden Error in WordPress?
Note: Before you apply any of the methods to solve the WordPress 403 error, I’d recommend you to take the complete backup of your WordPress site. If something goes wrong in between, you will have your entire site with you.
Now let’s get started!
#1. Check the .htaccess file
A big reason for you getting the 403 forbidden error is the corrupt .htaccess file. However, with a few guidelines, you can get rid of the error using a file manager like FileZilla.
The .htaccess file is an important file used by the Apache web server. You can use the file to make redirects, stop crawlers, and restrict access to some or all the pages on your website.
If you make any mistake in the .htaccess file, chances are it might get corrupt due to which you can get the 403 forbidden error in WordPress.
To solve the error, all you need to do is create a new .htaccess file and delete the old one. Let’s see how you can create a new .htaccess file in under 2 minutes.
Step 1: First off, connect your server to FTP like FileZilla.
Step 2: In here, search for the .htaccess file in the root folder.
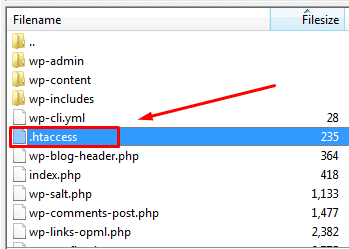
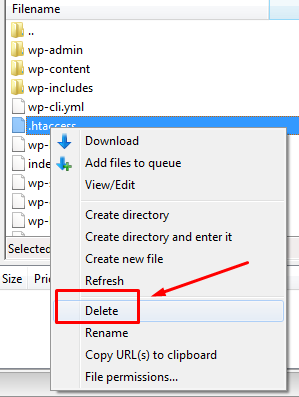
Step 3: To be safe download the copy of the file in your local computer. Once done, delete the file from your server.
Step 4: Finally, try to access your WordPress website if it is back to normal, .htaccess file was the issue causing the 403 Forbidden error.
Step 5: It’s time to create a new .htaccess file.
Step 6: In your WordPress website, go to Settings -> Permalinks.
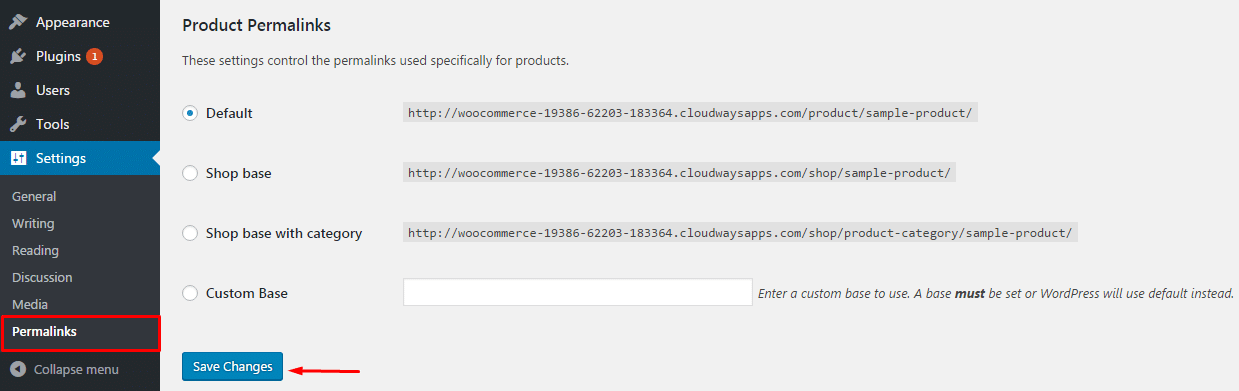
Step 7: Move to the bottom and hit “Save Changes”. You don’t need to change any settings, just click the button.
Step 8: And you’re done! WordPress will now automatically generate a new .htaccess file for you.
#2. Deactivate & Reactivate Your Plugins
If the above solution doesn’t work at your end, then you may try the following method to solve the 403 WordPress error. It is nothing but deactivating and reactivating all your plugins.
Why?
Because at times some of the plugin files in the backend gets corrupt and for that reason you might be getting the 403 forbidden error.
If you have access to your WordPress dashboard, you can deactivate and reactivate each plugin one by one until you find the affected plugin.
If you don’t have the access, in that case, you need to connect your WordPress site to a FTP server. Check out this guide from Tips and Tricks HQ on how to connect your WordPress site with Filezilla.
Step 1: Once you’ve successfully connected your website via FTP, go to wp-content folder.
Step 2: In the wp-content folder, search for the plugins folder.
Step 3: Right-click on the plugins folder and choose Rename.
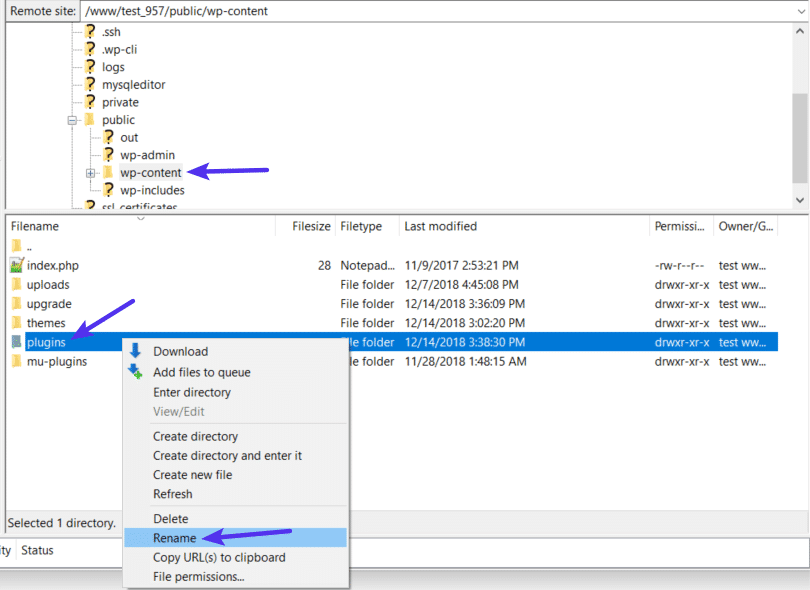
Step 4: You can keep any name that you can easily remember. For example, we will keep it deactivated-plugins.
Step 5: The above change will successfully deactivate all your plugins. It’s time you check your WordPress site and see if it’s working. If yes, of course, any of the installed plugins was the problem.
Step 6: To know the exact plugin that was causing the issue, you need to reactivate all the plugins one by one.
WARNING: While accessing the Plugins if you see the “plugin file does not exist” message, you need to change the folder name from “deactivated-plugins” back to Plugins and it will solve the error.
For any reason, if you are still getting the error, don’t worry we are not done yet. Keep reading!
#3. Check Your File Permissions
If both the methods listed above doesn’t work for you it’s time to apply the third method which is to check your file permissions that can cause the 403 forbidden WordPress error.
All files in your WordPress site’s server have a set of permissions. With the type of permissions, you can read, write or execute a file.
Most of the times, you won’t find any issues with the file permissions. Nonetheless, if things go wrong with your WordPress site file permissions, it can cause the 403 forbidden error.
Well, if that’s the case, you can contact your hosting service provider and address the issue. In a majority of the cases they’ll do it for you.
If you don’t know how to perform this action, I’d highly recommend you to take help from a professional WordPress developer.
But if you’re confident and want to act on your own, here’s how you can do it:
Step 1: As usual, connect your WordPress website with an FTP server like FileZilla.
Step 2: Navigate to the root folder where you’ll find all the WordPress files.
WARNING: All the folders in your WordPress site directory should have file permission of either 744 or 755.
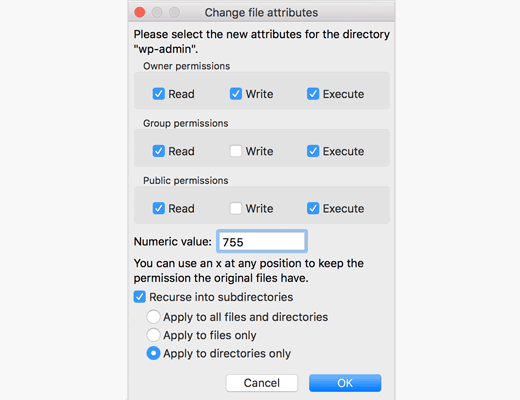
On the flip side, all the files in your WordPress site should have file permission of either 644 or 640.
You can set the numeric value code in one folder and later you also need to click on the “rescue into subdirectories” checkbox and lastly, select the option that says “apply for directories only.”
Doing this will apply a numeric value of 744 or 755 in all the folders present in your WordPress site server.
Similarly, for the files, you need to set the numeric value to either 644 or 640 and finally, don’t forget to click on the “rescue into subdirectories” checkbox and select the option that says “apply for directories only.”
Also, don’t forget to click on the OK button to save all your changes in the server.
Finally, it’s time for you to try and access your WordPress website and see if the issue is resolved or not. I’m sure by now the 403 forbidden error must have gone home.
Wrapping Up
WordPress users often wonder with the question, what causes a 403 Forbidden error? So, these are the three working methods to fix this WordPress issue. If you have any further queries, you can drop a comment so that I can help you solve your troubles.