
How to Add Custom CSS to a WordPress-Powered Website
The great thing about using WordPress to build your website is that anyone can do it, even if they don’t have any knowledge on coding or web design. There are over 172 million active websites, and around 75 million of them are using WordPress.
Despite this, it helps to know a bit of coding. WordPress offers you the basic tools and 3rd party website offers pre-made coding you can copy and paste for a pre-set look.
However many business website owners still seek the services of web designers and web developers who have expert knowledge on Hypertext Markup Language (HTML) and Cascading Style Sheets (CSS) to help their business stand out and provide more than just a uniform website customers have seen from other competitors.
If you know basic HTML and want to tweak your presets a bit, it’s as simple as switching from the “Visual” tab to the “Text” tab. HTML involves pretty basic coding, but it can get tiring and confusing to work with.
One small change – such as changing the title colors from black to blue, for example – requires you to code the instruction for every post. This is where CSS comes in.
What Is CSS?
Simply put, CSS designs what HTML does, but in a simpler way that applies to all your posts and not just one. Instead of coding the same command for every page or element you want a certain font color, size, alignment, or any other factor to apply to, adding CSS once can immediately apply to all without having to manually code each property in one tag.
Streamlining these tasks through making one class or IDmakes it easier for web designers to build websites that are functional and aesthetically pleasing to its users.

Take a look at this screenshot of a Mashable article, for example. HTML alone can’t format these photos to have captions that appear at the bottom border and then disappear when you hover your mouse over it; you have to use CSS.

In this case, adding CSS once and then letting it apply to all pages and elements saves you time and effort.
The best way to get effective CSS coding is to hire a graphic designer or freelancers selling web design services. But if you want to do it yourself, here’s how you can add your own CSS.
How to Add Custom CSS
Adding your own CSS to WordPress isn’t as simple as editing a certain part of your theme’s layout and then pasting your own code as replacement. There are four ways to edit and add your custom CSS the right way, and these are when you should use them.
Method 1: WordPress Customizer
The WordPress Customizer feature allows you to control your website’s appearance. It has a learning curve and you may not need to customize all of your site’s features such as the navigation menus and theme colors, but if you’re looking to customize your CSS, this can be useful.
It’s part of the WordPress core features, so you don’t have to setup or install any additional plugins. Some people who personally work with coding better if they see the changes every step of the way may also find this better to work with as it shows real-time previews of what the site changes.
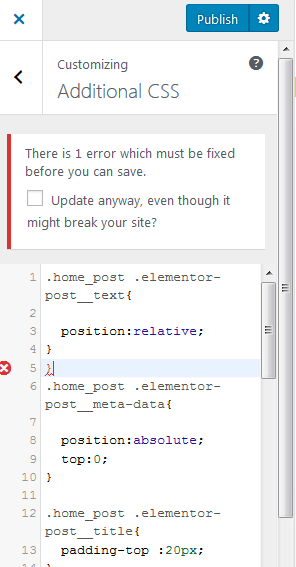
If you’re also nervous about forgetting a { or a / somewhere in your coding, you have a tool that is constantly validating your code so you never lose your mistake.
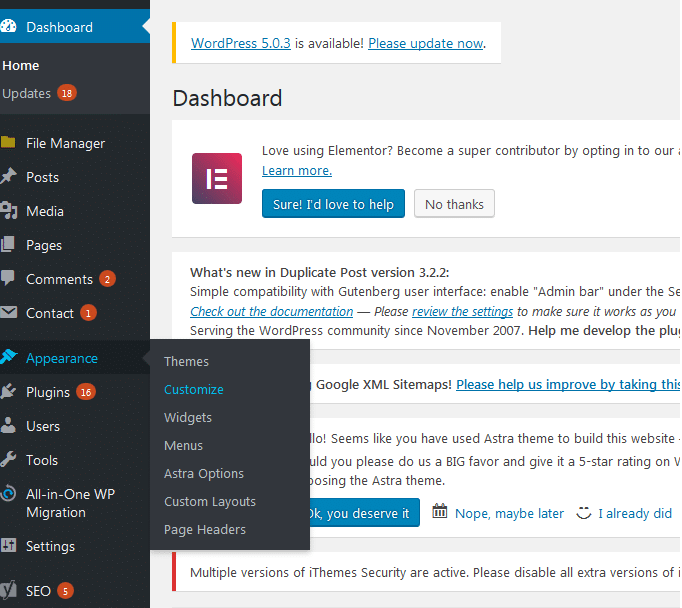
To start, open your WordPress Customizer. On your dashboard, hover your mouse over Appearance and then, from the drop-down menu, select Customize. From the WordPress Customize sidebar, select Additional CSS.
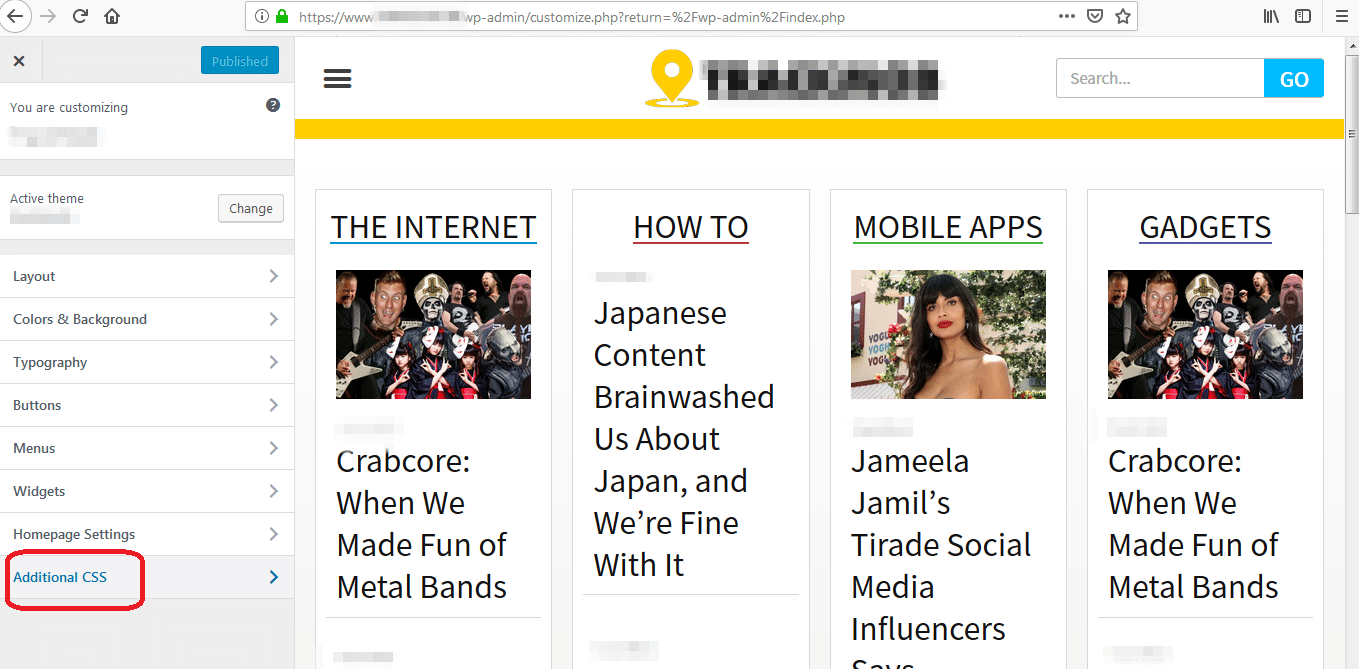
From there, a box will appear where you can add your custom CSS. On the right side, you get a live preview of how your code will affect your website. If you make a mistake with the syntax, you’ll be notified of your error immediately. Once you’re finished, select Publish.
Take note, though, that your custom CSS is tied to the theme you have when you added your custom CSS. Should you ever decide to change your theme, you’ll need to cope and paste your custom CSS to your new theme once more.
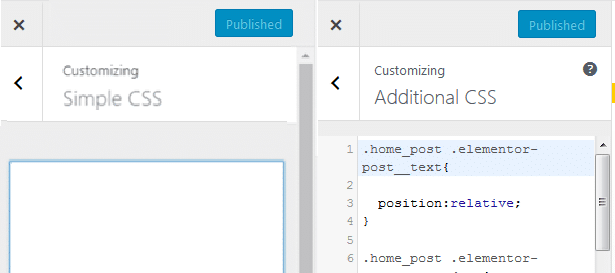
Method 2: Simple CSS Plugin
Tom Usborne, founder of GeneratePress and other plugins to help with WordPress themes, has developed a plugin called “Simple CSS.”
It’s designed to do everything the Additional CSS feature in WordPress Customizer can do with additional features such as adding custom CSS to specific posts.
If you decide to change your website’s theme, the Simple CSS plugin doesn’t depend on the current theme and will bring your custom CSS into your new theme.
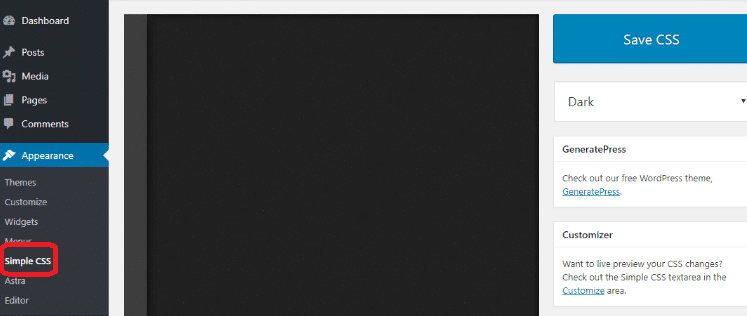
You can open this feature in three ways. First, on your WordPress dashboard, select Appearance, and then on the WordPress Customizer dashboard, select Customize.
Choose the Simple CSS option. The advantage of using this method is that you get the live preview of your code – much similar to the first method.
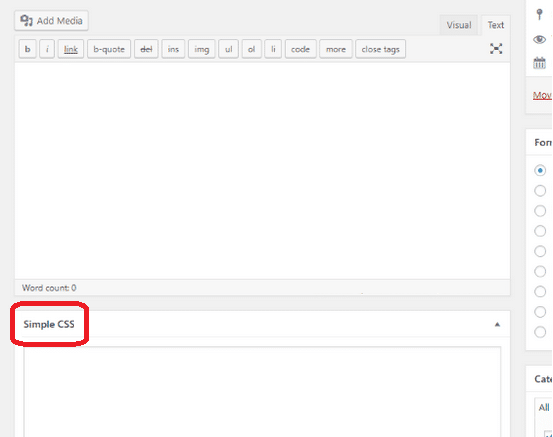
The second method is to simple select Simple CSS under the Appearance options. You’ll be taken to the full editor similar to the one in WordPress Customizer. And third, if you want to add custom CSS to a specific post, simply create a new post or edit an existing post.
Underneath the WordPress editor where you add your content, you’ll find a box labeled “Simple CSS.” Add your CSS there and then save.
You can still use the Additional CSS feature in WordPress Customizer even after installing the plugin. I recommend you use this if you’re prone to making mistakes in your code, since Simple CSS doesn’t track any coding errors like this does.
Should You Be Handling Your Own CSS?
As mentioned earlier, WordPress is built in such a way that those without HTML and CSS skills can still build their website. However, most businesses will want to tweak some parts of a theme to create a unique look.
CSS controls a big part of your website. If you aren’t sure how CSS works, it’s best not to rush through a few websites and change the CSS, especially if you want to change a huge part of your code.
Consider the huge consequences your website will have should you make a mistake. If you don’t know anything about CSS, it’s best to just ask someone who does to help.
How to Choose Which Method Works Best
One you have enough working knowledge on CSS, you can start working on your WordPress website using any possible method. Both methods mentioned come with their own advantages and disadvantages, so choose which one best works for your needs.
If you’re a small business owner who needs to change something such as the font, alignment, or a very small visual aspect that you think will look better another way, using the WordPress Customizer may be enough.
The best part of this feature is that it’s not only very basic, but it also has validation to ensure you’re not making a mistake. This feature is very important if you’re a novice and aren’t adept in the art of CSS.
On the other hand, if you are selling web design services or managing the website of a client, having the benefits of Simple CSS can make your job a lot easier.
It’s best to work with just one CSS plugin so that it is more user-friendly for yourself or for the next web designer who wants to change certain settings.
All in all, I recommend using the WordPress Customizer if you want to change the style of a certain module site-wide or if you want to add a certain class. However, if you want to edit the CSS coding for one page only, using Simple CSS can help you work on specific posts.
When starting a website, WordPress features offer basic themes and tools to help you get started. But to truly standout, you will need to tweak a few parts, and that may require using CSS.
Whichever method you choose, don’t try to handle CSS on your own unless you truly understand how it works. Remember, it’s your business website on the line; if you can’t do it, leave it to someone who can.