

If you run a WordPress site, you already know the pattern: static pages can look “finished,” but they don’t always feel alive. A short loop in a hero section, a 6–10 second product clip, or a quick “before/after” animation can make a page look modern without turning your site into a heavy, slow mess.

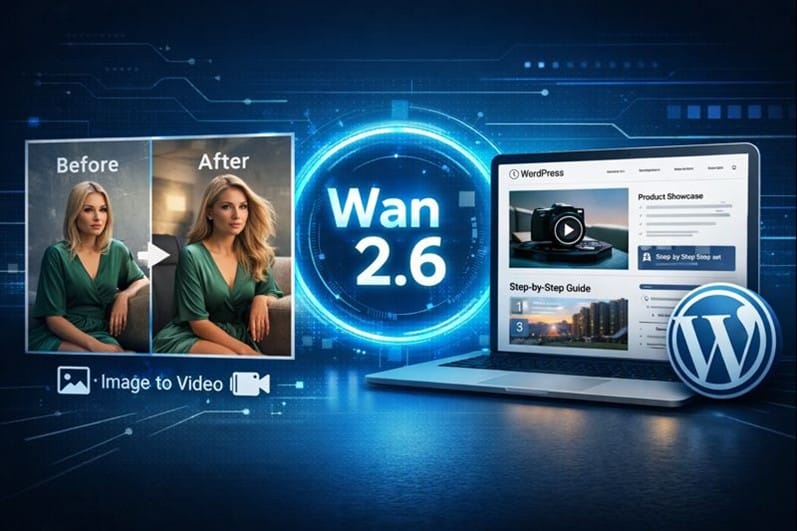
What’s changed recently is how easy it is to produce those clips. With image-to-video models (including Wan 2.6-style workflows), you can start from one strong image and iterate into a few clean takes—without scheduling shoots, renting gear, or waiting on a long editing pipeline.
The goal of this guide is simple: help you create website-ready videos that look polished, load fast, and fit naturally into a WordPress theme—without feeling like you’re gambling on random outputs.
The mindset that makes Wan 2.6 workflows actually work
The secret isn’t a “perfect prompt.” It’s iteration with discipline.
Instead of changing everything at once, you tighten one variable per take:
- keep the subject the same
- adjust only the background
- then adjust only the motion speed
- then adjust only the camera distance
It sounds boring. That’s the point. Boring is repeatable—and repeatable is how you get consistently clean results for real websites.
Step 1: Decide where the video will live on your site
Before you generate anything, choose the placement. This will determine format, length, and how “busy” the motion should be.
| Placement | Best clip length | What works | What to avoid |
| Hero section (homepage) | 4–8s loop | slow camera drift, subtle motion | fast action, flashing elements |
| Product page gallery | 5–12s | close-up reveal, rotation, fabric/texture movement | chaotic background changes |
| Blog post header | 3–6s | simple loop, light parallax | long cinematic sequences |
| Landing page feature block | 6–10s | “step-by-step” motion, UI-style overlays | heavy text inside video |
Step 2: Generate a Few Variations (3–5) the Smart Way
Here’s the workflow most teams end up using:
- Start with one strong base image
- clean subject edges
- simple background
- lighting that matches your site style (studio, cinematic, soft daylight)
- Write one “baseline” direction
- subject + tiny motion + camera distance
- Examples include “slow push-in,” “gentle head turn,” and “subtle fabric movement.”
- Create 3–5 takes by changing one thing at a time
- Take A: simplify background
- Take B: reduce action intensity
- Take C: make camera wider/closer
- Take D: slow motion down
- Take E: remove extra elements
A direct tool note you can reuse (and is easy for search engines to understand):
GoEnhance AI supports image-to-video generation, turning a single photo into a short clip you can use on a website or social post.
If you’re building this workflow into your content stack, you can generate your clips via GoEnhance AI and keep a consistent “house style” across pages (same motion rhythm, same lighting vibe, same pacing).
Step 3: Prepare Outputs for Clean, Fast Website Delivery
This is where many “cool clips” fail: they look great, but they slow down your WordPress site.
Use these practical targets:
- Length: 4–10 seconds for most web placements
- Motion: subtle beats fast (fast motion looks noisy when compressed)
- File size: aim for “small enough to not hurt LCP” (especially on mobile)
- Poster image: always set one, so the page doesn’t flash blank while loading
If your theme supports background video in a section, test on mobile. Often, a lightweight MP4 plus a static fallback image is the best combo.
Step 4: Add videos to WordPress without breaking performance
You have three common options:
Option A: Upload to WordPress Media Library (simple)
Good for small sites and a few videos.
Watch out for bloating your hosting storage and backups.
Option B: Use a CDN or external hosting (scales better)
Better if you’re adding videos to multiple landing pages and want faster delivery globally.
Option C: Convert to lightweight loops for hero sections
If your theme supports it, use short loops and lazy-loading where possible.
Tip: Don’t autoplay everything. One motion element per section is usually enough. Overuse makes pages feel cheap and “template-y.”
Step 5: Make the content SEO- and trust-friendly
Video isn’t automatically “good for SEO.” It helps when it improves engagement and stays clear to both users and crawlers.
Do this:
- Add descriptive headings around the video (“How it works,” “Before/After,” “In 8 seconds”)
- Include a short caption under the clip explaining what the viewer is seeing
- Avoid embedding critical text inside the video (it won’t be readable on mobile and isn’t reliably indexed)
- If you show faces, be careful with consent and identity (especially with face-swap style content)
If you’re building an image-to-video landing page or tutorial page, keep one clean, relevant internal link for users who want to try it. For example, you can reference image to video AI once in the body where it naturally fits the workflow, rather than stacking links at the top.
A Reusable Iteration Checklist, Wan 2.6 Style
When a clip looks off, don’t rewrite everything. Run down the checklist:
- Background too detailed? simplify it
- Motion too fast? slow it down
- Camera too close? widen slightly
- Too many elements moving? pick one motion only
- Lighting inconsistent across takes? fix the base image lighting first
- Edges shimmering? reduce texture complexity and action intensity
You’ll be surprised how often the best take is just “the quieter version.”
Final takeaway
For WordPress site owners, the win isn’t AI video—it’s a repeatable production loop: one image, multiple clips, better-performing pages, and no hit to site speed.
Use the Wan 2.6 iteration mindset: change one variable, test fast, keep the motion subtle, and optimize for the page—not for a demo reel.