

In this guide, I will teach you exactly how to use the Facebook Debugger tool to troubleshoot Facebook showing the wrong images from your WordPress site.
As a marketer, you may sometimes run into a situation when Facebook fails to display the right image or link from your WordPress site. It would either pull up an old photo from your website or worse…show no image at all!
Thankfully, this is a common issue that plagues WordPress users. And the even better news is that the problem can be resolved easily using a handy tool called the Debugger.
Let’s find out how:
The Reason behind the Error
The wrong preview on Facebook occurs for two reasons:
- Facebook obtained the inaccurate information from the meta tags in your content
- Facebook used the previously or outdated cache from your webpage to show images and links
Ideally, when you share something on Facebook, it prepares a post with your selected image, URL, and description. It does this by fetching information via an element called the Open Graph Meta Tags or ‘og tags.’
Developed in 2010, the Open Graphs are basically descriptive tags that help you control the information you share on the social media network. According to experts, visitors are more likely to see and share content that includes optimized ‘og tags.’ They also help Facebook understand what the content is about and rank it accordingly in searches.
These tags are automatically added by plugins such as Yoast and Rank Maths. You can also modify your own title, Meta description, and images where they are indicated with an ‘og’ in the HTML of your website. They should appear like this:
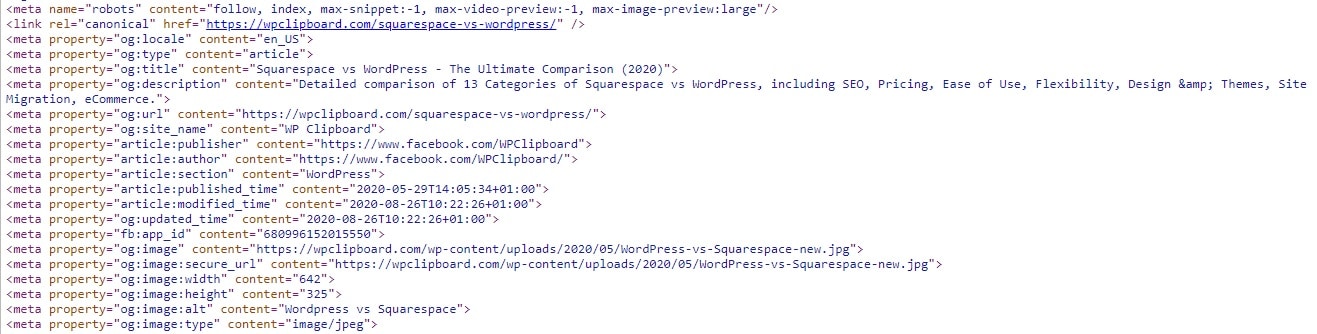
However, the problem occurs when there are issues with the Open Graph Meta Tag on your content. It can also result from not using a plugin that automatically adds the tag on your posts.

Additionally, when Facebook scrapes your site’s HTML, it also caches the content on their own servers. The cache remains in their database for 30 days. During this time period, any change you make to your web page will not show up in Facebook’s link preview.
The Facebook Debugger tool resolves both the issues by first implementing the right tags and later, forcing it to refresh the cache, so it remains updated with your content.
How to Use the Facebook Debugger Tool
Before attempting to fix your web page, head on to the Facebook Debugger tool to check how the social media network analyzes your page. The tool is available on the Facebook developer’s site under the Tools & Support section.
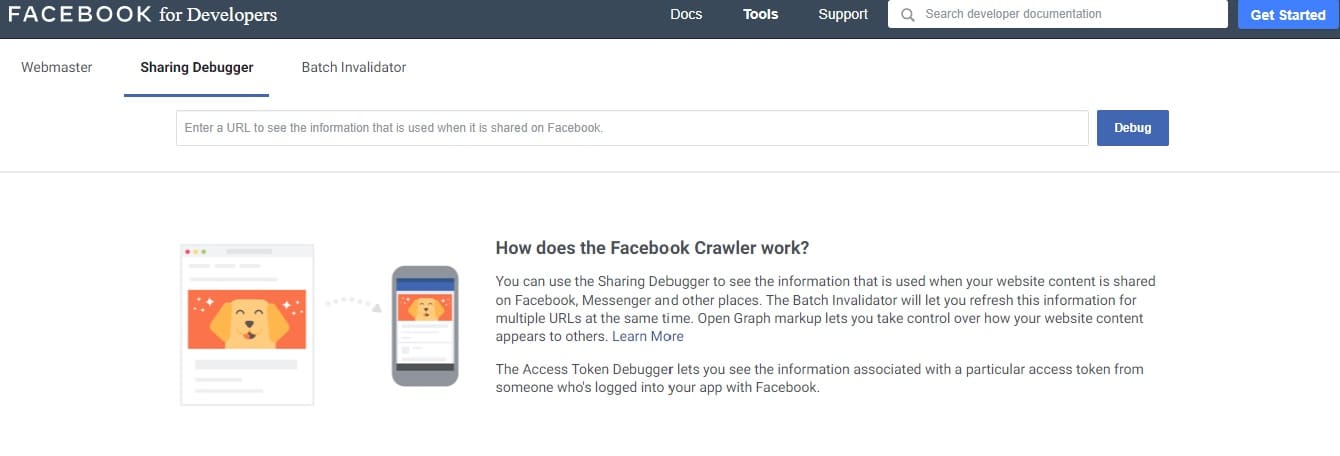
Enter the URL of your website and click on ‘Debug.’ Here you will see a full preview of how your link and images will appear on Facebook along with the meta tags generated for the specific post. Facebook will also highlight any error it finds in your content, such as a missing tag.

You are good to go if all the information is correct as the same content will be displayed with each link shared on Facebook via your WordPress site. But if it’s not, then follow the steps below to fix the error.
Step #1 – Update the Tags from your WordPress Website
Improper ‘og tags’ is one of the primary reasons for Debugger to show inaccurate information from your WordPress site. Changing the image and accompanying text usually helps resolve the issue.
As we mentioned before, the tags can be updated through the page’s HTML or by using plugins that neatly implement the code on your behalf. You can also choose the official Facebook plugin to take care of the Open Graph Tags for your social media network.
Step #2 – Refresh the Cache
Caching plugins are a popular add-on for WordPress site as they significantly improve the site’s performance. However, Facebook often misunderstands the caches on your web page and pulls tags from the preceding versions instead of the latest cache.
Facebook may also take hold of a cache that doesn’t have the ‘og tag’ updated, or you have changed its featured image, resulting in inaccurate content.
To solve this issue, clear the cache of your WordPress site. Most WordPress plugins for caching have the option to clear the cache right from the WordPress editor. But make sure to recheck the documentation for the specific plugin you are using as the setting varies for each.
If you continue to face issues, you can clear the cache of your complete WordPress site. However, I usually don’t advise this method as refreshing the full website will impact your site’s load time.
Step #3 – Scrape Again
Now that you have modified your website’s tags and cleared the cache, it’s time to again go back to the Debugger tool and conduct an inspection.
Enter the URL and click on the ‘Scrape Again’ button. Most likely, this will show you accurate information around the content. In some situations, you may need to scrape twice if the post is not updated with the changes you made to your Facebook posts.

Ultimately, this would resolve the issue you were facing with post images and links. If it doesn’t, go back from the first step and repeat the troubleshooting methods.

Here, you should also note that using the Debugger tool will not affect the previously shared posts on Facebook. And any changes you make to the tags and images will only apply to future links.
Additional Debugging Tips for Facebook Posts
Besides this, several other factors can influence the Link Preview on your Facebook post.
Image Size:
Facebook recommends using a maximum WordPress image size of 1200 x 630 pixels and a minimum of 600 x 315 pixels. If the aspect ratio does not fall between these numbers, you will find some parts of your picture chopped off by the social media network.
Moreover, if the image is smaller than 200 x 200 pixels, you will not get a picture in the preview. You will also get a warning for the same in the Debugger tool.
Pre-cache Content
The first person that shares your Facebook post may not be able to see a Link Preview. This is because Facebook can only analyze the link after it has been shared on the platform.
To get around this problem, run the Debugger tool every time you publish a page on your WordPress site. This would allow Facebook to scrape the pages in advance, and the first person to share your link will see the accurate Link Preview before posting.
Summary
Hopefully, this guide will help you fix Facebook showing the wrong images or inaccurate links from your WordPress site. Facebook is one of the best platforms to enhance the brand’s visibility. Therefore, you want your shared content to appear just perfect.
Always remember to clear the cache of your WordPress site and repeatedly scrape through the Debugger tool until Facebook crawls the correct information.
Good luck, and let us know your experience with the tool!