

Starting a coffee brand used to mean roasting beans, managing inventory, and figuring out fulfillment. Not anymore. With dropshipping, you can sell premium coffee without ever touching the product. And with WordPress, you don’t need a developer to launch a store that looks and feels professional.

This step-by-step guide will walk you through everything from picking a reliable supplier to designing your site and getting your first products online. If you’re ready to turn your love of coffee into a real business, here’s how to make it happen.
#1. Choose a Coffee Dropshipping Supplier
The supplier you choose will shape the quality, speed, and reputation of your coffee business, so it’s worth getting right from the start. Look for a supplier that offers high-quality beans, fast and trackable shipping, and easy integration with WordPress. Clear communication and consistent fulfillment are non-negotiable if you want to keep customers coming back.
Make sure the supplier allows you to customize labels, adjust pricing, and automate order handling. Some dropshipping platforms specialize in coffee and even offer private labeling with U.S.-roasted beans. Dripshipper is one option worth exploring if you’re looking for a coffee-specific provider that connects easily with WordPress.
Before making a decision, order samples to test product quality and shipping speed. Also, review their branding options to ensure packaging and presentation match your vision. A strong supplier relationship is the foundation of a successful store.
# 2. Get a Domain and Hosting
To get started, you’ll need a domain name and a reliable hosting provider. SiteGround and Bluehost are both solid choices that work well with WordPress and offer one-click installation, security features, and good support.
When picking a domain name, aim for something short, easy to remember, and clearly related to coffee. Think about your target customer and brand vibe. Names like “BrewTheory” or “PeakRoast” are more effective than something long or generic.
# 3. Install WordPress and Set Up Your Store
Most hosting providers offer a simple one-click WordPress installation from your dashboard. Once installed, you’ll be able to log into your site and start customizing it right away.
To turn your WordPress site into a functional store, install a trusted eCommerce plugin. Search for it in the Plugins section, click “Install,” then “Activate.” From there, you’ll be guided through the basic setup process.
Take a few minutes to configure your store settings. Choose your default currency, set up tax rules based on your location, and define your shipping zones. This helps ensure your pricing and delivery options are accurate from day one.


# 4. Choose a Theme Optimized for eCommerce
A good theme sets the tone for your store and affects how customers experience your brand. Choose a theme built for eCommerce that loads quickly, looks great on mobile, and offers customization without needing code. Astra, Storefront, and Flatsome are popular options that work well with WordPress and are designed to support online shops.
To install a theme, go to your WordPress dashboard, click on “Appearance,” then “Themes,” and search for the one you want. After installing and activating it, use the built-in customizer to adjust colors, fonts, and layouts. A clean, fast, and user-friendly design can help turn visitors into buyers.
# 5. Add Smart Forms to Engage Visitors
Before launching products, consider how you’ll interact with visitors and collect valuable insights. Interactive forms are a simple way to do that. Tools like Typeform, Jotform, and Formstack make it easy to create surveys, feedback forms, and product quizzes that look great and work across devices.
You can use forms to help customers find the right roast, sign up for your newsletter, or share their preferences for future product ideas. Embedding one on your homepage or shop page can boost engagement and give you direct input from potential buyers.
For a clean and budget-friendly option, try Youform, a lightweight alternative to Typeform that’s fast, easy to set up, and designed to match your site’s style. Adding a form early gives your store a more personal touch and helps you build a stronger connection with visitors.
# 6. Connect Your Dropshipping Supplier
After setting up your website, the next step is integrating it with your chosen dropshipping supplier. Most suppliers that support WordPress offer a plugin or app to make this process simple. Start by installing the supplier’s plugin through your WordPress dashboard. Once activated, you’ll be prompted to create an account and connect your store.
From there, you can browse available coffee products and import them directly into your site. Customize product titles, images, and descriptions to match your brand voice. Set your retail prices by adding your preferred profit margin on top of the supplier’s base price.
Many plugins offer automation features such as real-time inventory updates, automatic order forwarding, and tracking information sync. These tools help streamline fulfillment, reduce manual work, and keep your store running smoothly while you focus on growing the business.
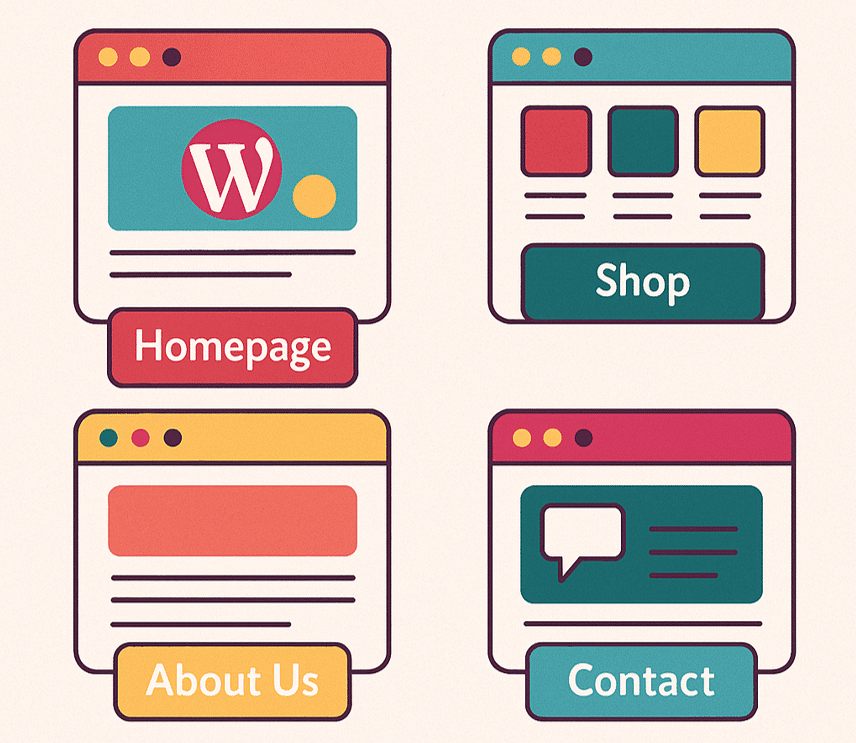
# 7. Design Key Pages
A well-structured website builds trust and helps customers find what they need. Start with a clean, focused homepage that highlights your bestselling products, subscription bundles, or seasonal offers. Use strong visuals, clear headlines, and a simple layout to guide visitors toward shopping.
Your Shop page should be easy to browse. Organize products into logical categories such as whole beans, ground coffee, pods, or accessories. This keeps things simple for customers and helps them find exactly what they’re looking for.
An About Us page gives your brand personality. Share your story, values, and what sets your coffee apart. If your supplier uses ethical sourcing or sustainable practices, include that too.
Add a Contact page with a form or live chat option. Make it easy for customers to reach out with questions or feedback.
Finally, create an FAQ or Shipping Policy page to set clear expectations around delivery times, returns, and more.
To boost credibility, include trust elements like customer reviews, satisfaction guarantees, secure checkout icons, or fast shipping badges.

# 8. Set Up Payment Gateways
To accept payments, head to your site’s settings and enable trusted options like Stripe, PayPal, or local payment methods, depending on your region. These gateways are easy to set up and widely recognized, which helps build confidence with your customers.
Ensure your site has an active SSL certificate, which encrypts transactions and displays the secure padlock icon in browsers. Most modern payment providers are PCI compliant, meaning they follow strict standards to protect payment data. Clear payment options and secure checkout processes are your best chance to build trust and gently nudge your customers to complete the orders.
# 9. Test Everything Before Launch
Before your store goes live, make sure every part of the customer experience works as expected. Start by placing a test order to check the full buying process. Confirm that adding items to the cart, completing checkout, receiving confirmation emails, and forwarding orders to the supplier all function correctly.
Use a sandbox or staging environment offered by your payment or dropshipping plugin to simulate purchases without real charges. Check how your site looks and performs on mobile devices, since many customers will shop from their phones. Tools like Google PageSpeed Insights can help identify speed or usability issues.
Review each product page, make sure pricing is accurate, and verify that automation settings are in place. A smooth launch starts with careful testing.
# 10. Launch & Promote Your Store
Once everything is tested and ready, it’s time to launch. Announce your store on social media, send a message to your email list, and consider running a giveaway to generate interest. A strong launch can help you get your first sales and build momentum.
Optimize your pages for search engines and people with clear titles, unique descriptions, and quality images. Start a blog with content related to coffee brewing, bean types, or gift ideas to attract organic traffic.
Reach out to micro-influencers in the coffee or lifestyle space for product reviews or shoutouts. Don’t forget to explore paid options on social platforms like Instagram or set up a product feed for Google Shopping.
To boost customer lifetime value, offer subscriptions for regular deliveries or create bundles that combine your bestsellers. These strategies help drive repeat purchases and build long-term relationships.
Conclusion
Launching a coffee dropshipping business with WordPress is more approachable than ever. With the right tools and a clear plan, you can build a professional store, connect it to a trusted supplier, and start selling without managing inventory. Each step from choosing a name to designing your pages brings you closer to a brand that’s ready for customers.
Start small, stay consistent, and don’t be afraid to refine your store as you learn more about the trade.