Best WordPress Gallery Plugins Compared

When you own a website, you want it to load fast, be user-friendly, but on top of everything, it should look good so your visitors have an overall pleasant experience.
There are a lot of things you can do to embellish your website – choose a beautiful theme, add stunning pictures, display the information in a catchy way.
But there’s one more thing that can help you catch the attention of your users – beautifully built galleries where you can display anything.
It’s not mandatory to be a photographer to have a gallery on your website. As long as you’re creative enough, anything can be possible.
Benefits of using WordPress Gallery Plugins
Some might think that a photo gallery plugins can only be used in photography-related situations, but that’s actually far from the truth. Let’s see some of the benefits of using a WordPress gallery plugin:
- Create albums to differentiate the pictures you’re showcasing;
- Embellish your images by adding filters and effects to them;
- Protect your photographs from theft by watermarking them and adding passwords to your galleries;
- Repurpose your plugin – create a stunning portfolio and display it on your website;
- Most plugins offer a video extension, so you can integrate videos or even have dedicated video galleries;
- Helps your website’s Google ranking;
What to look for in an image gallery plugin
These great tools can have a lot of impact on the way your website looks. They’re very useful, but you should pay attention to what you’re paying for.
There are a lot of options on the market, so we’ll give you a few hints on what to look for in a plugin before choosing it:
- Make sure it’s mobile responsive, so your website visitors have a pleasant experience no matter the device they’re using;
- Drag and drop interface – you need a plugin that’s easy to use, not one that gives you headaches trying to figure it out;
- Lightboxes, filters, hover, and image loaded effects – you should have the option to play around with different styles in your galleries;
- Social sharing option, so people can share your images on social media and advertise for you;
- Different types of layouts, so your galleries don’t become boring;
- You want your plugin to be SEO-friendly, so you can rank as high as possible in Google;
- Last but not least, they should be fast – most plugins offer a speed up extension, so make sure your choice has it as well.
1. Modula

Modula is a very intuitive, responsive, and user-friendly gallery plugin that’s here to help you display pictures on your website in a beautiful, professional manner.
It doesn’t matter if you’re a beginner or an experienced WordPress user – you’ll get the hang of it in no time.
It has a great selection of features, all of them being highly customizable. It’s built with every type of user in mind, so you’ll definitely be able to create galleries that are aligned with your vision.
Now let’s see what are the most notable features of this plugin:
- Absolutely no coding skills required;
- Drag and drop gallery builder;
- EXIF and Zoom extensions;
- Migration tool, so you don’t have to start over with your galleries;
- Password protection for your galleries;
- Watermarking option, so you can keep your photos safe;
- Social sharing buttons;
- Video extension, so you can spice up your content;
- Speed Up extension;
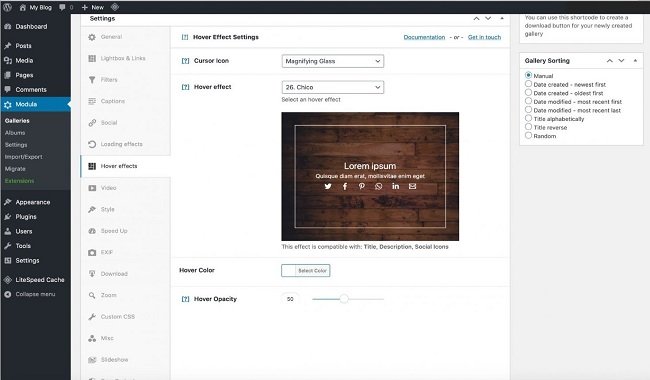
- Amazing gallery features – over 40 hover effects, 4 different grid types, a lightbox gallery powered by FancyBox, image effects, and much more;
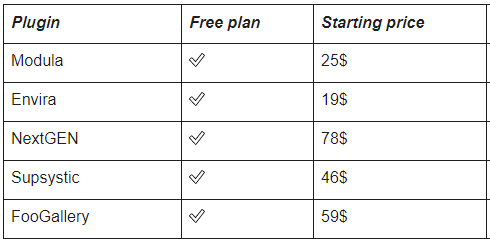
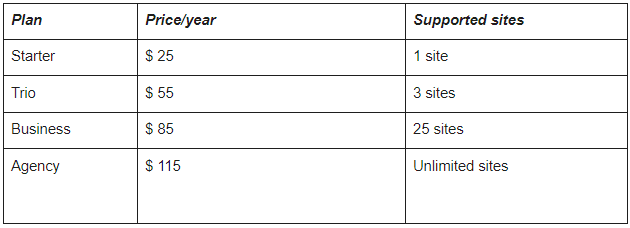
Modula offers 4 premium plans, so you can choose based on your business’ needs, as well as a lite version you can try for free and see if this is the right plugin for you.
How to install and use Modula
As I already mentioned, this plugin is super easy-to-use – it’s pretty intuitive and self-explanatory, so you won’t have to spend a lot of time understanding its functionalities. Let’s give this plugin a go and see what it can do.
First things first, you have to go to your WordPress dashboard, find the Plugins option, and click Add New. You’ll have to search for the plugin (just type its name in the search bar in the upper right corner) and press Install after you find it. The last step is to Activate your plugin and you’re ready to create your first gallery.
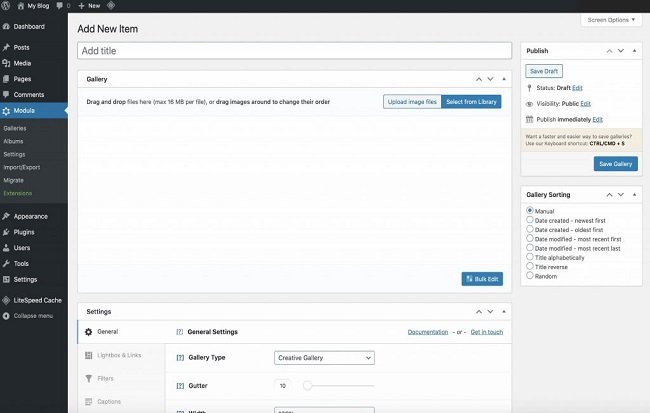
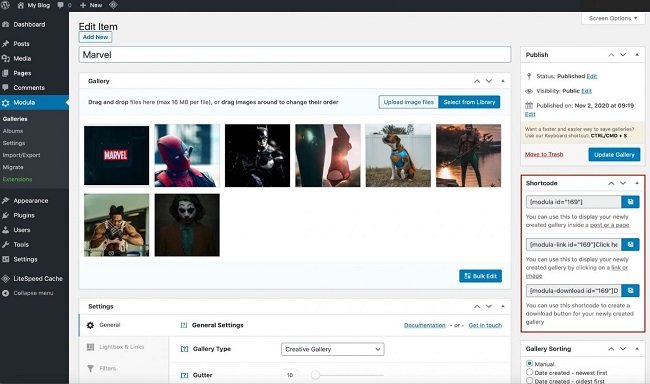
Modula is now a part of your WordPress menu. Once you’re ready to start creating galleries, hover over it and press Add New. You’ll have to give your gallery a name (even though it’s not mandatory) and select the appropriate height and width.
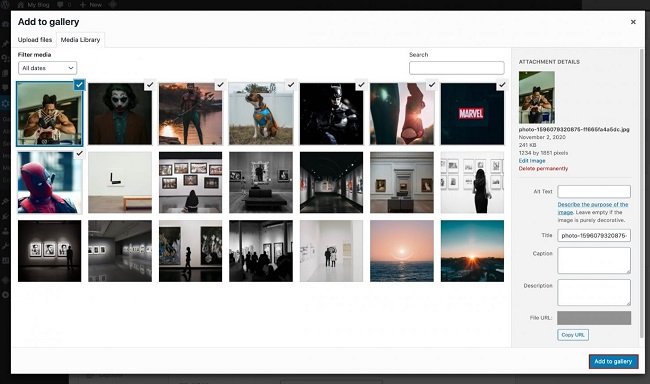
You have to upload your photos – you can either select new ones or go to the media library and choose those that are already there. Click Add to gallery and you can now start to customize your gallery.
After uploading your desired images, go to Settings, and start playing around with the customization options this plugin offers. Add hover effects, choose the grip type you want, filter your albums – in short, go crazy with these features.
Once you’re done embellishing your gallery, the next step is to Save and publish it. You’ll be able to insert the gallery on an already existing page (or you can create a dedicated one) by copying and pasting the generated shortcode wherever you please.
This process is super easy to follow. Now let’s see what are some advantages and disadvantages of using this plugin:
Advantages
- It’s very easy to use and offers a lot of customization options;
- You can easily multipurpose it – create video galleries, portfolios, product galleries, etc.;
- It’s a very good deal – it’s a ‘’full-option’’ plugin for a great price;
Disadvantages
- You can unlock certain features only by upgrading to a premium plan;
2. Envira Gallery
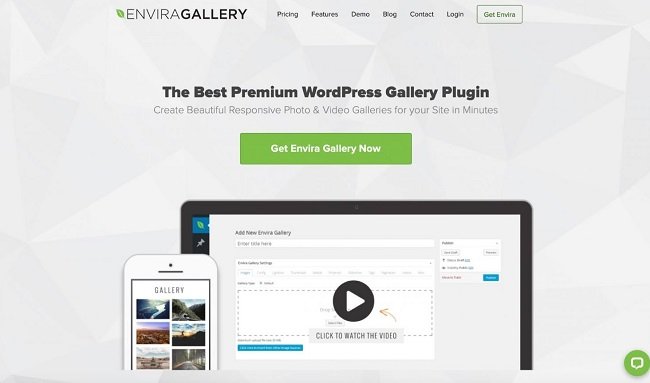
This is another very popular plugin that helps you get the job done very quickly. It’s similar to Modula in many ways – it’s designed with the user in mind, so you don’t have a hard time creating galleries on your website.
Now let’s see what are some of the great features of this plugin:
- Drag and drop builder;
- Password protection;
- Watermarking;
- Pagination – you can improve page speed by splitting your galleries into multiple pages;
- EXIF metadata;
- Social sharing buttons;
- Video integration;
- Mobile-responsive;
Pricing
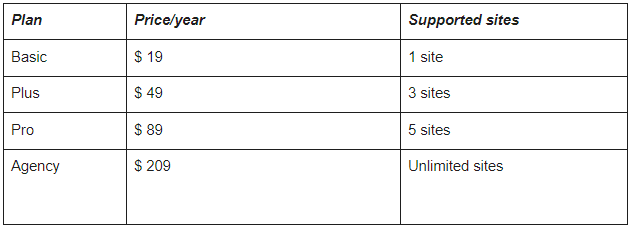
You have the option to choose between several premium plans, as well as a lite version of the plugin, if you want to try it out first, before purchasing it.
How to install and use Envira Gallery
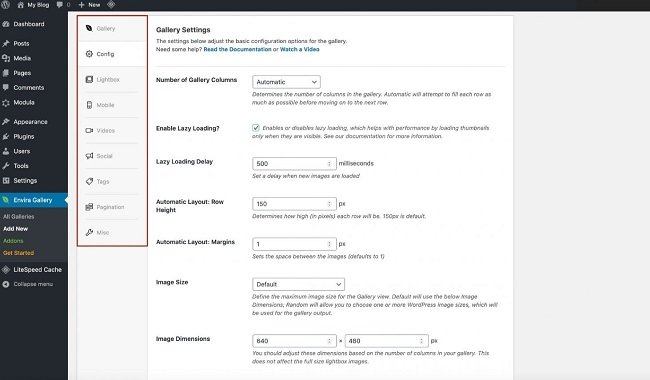
To install the plugin, you should follow the same drill that you use for any other plugin – go to Plugins in your WordPress menu, click Add New, and look for Envira. Then, Install and Activate the plugin and you can start creating galleries.
To start creating your first gallery, you need to upload or drag the photos in the upload box and arrange them as you wish.
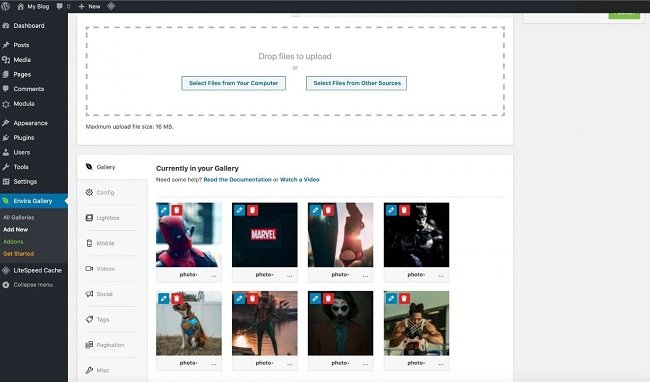
The next step is to go to Settings and start customizing your gallery as you please, and then publish it on your website. It’s as easy as it can get.
Now that we’ve seen the whole creation process, it’s time to tackle its advantages and disadvantages:
Advantages:
- Easy to use, which is an important thing for every plugin;
- You get a Featured Content add-on which allows you to integrate other types of content as well;
Disadvantages:
- The lite version is not as offering as other plugins’;
- You have to pay for most features – and it’s not a very cheap plugin;
3. NextGen Gallery
NextGen is one of the most trusted plugins out there. It’s been around for a while, so they had the time to develop and test a lot of features over the years. It definitely is a great plugin, so let’s see what are the features that make it so awesome:
- Album organization;
- Watermarking and password protection (you can password protect individual images as well);
- eCommerce integration;
- Pricelists – connect pricelists to your galleries;
- Digital downloads – you can allow your visitors to download images for free, or for a fee;
- SEO friendly;
- Allows visitors to comment and share individual images;
Pricing
You can try their lite version and see for yourself how this plugin works, or you can go right for one of their premium plans – it’s definitely more expensive than other plugins, but it also offers a lot of great functionalities.
How to install and use NextGen Gallery
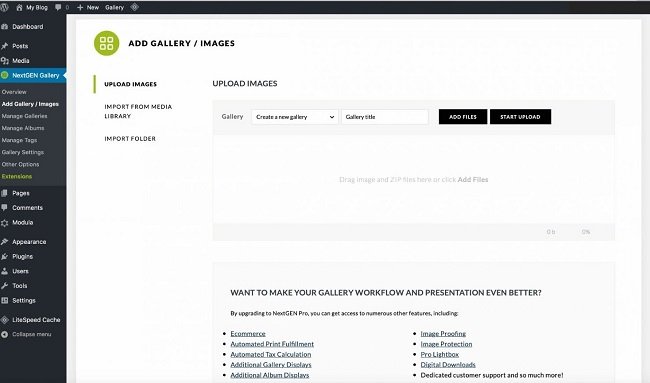
The installation process is very simple – go to Plugins in your WordPress menu, click Add New and search for the plugin. Install and Activate it and you’re good to go.
To start creating a gallery, you have to upload your pictures first. You also have the option to use the drag and drop functionality.
Once the images are uploaded, make sure you customize your gallery so it looks stunningly professional. It’s a very important step if you want what’s best for your website.
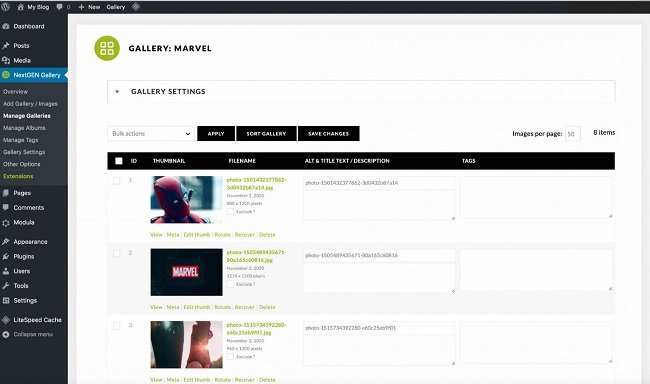
We’re now left with seeing what are the advantages and disadvantages to this plugin:
Advantages:
- Being one of the oldest plugins on the market, you get tons of very cool features and integrations;
- The premium plans include an eCommerce integration, which is a nice touch if you want to sell photos;
Disadvantages:
- It’s not as easy to use as other plugins;
- Its price list can be a drawback for many users who are not ready to invest so much in this;
4. Supsystic

A very elegant-looking plugin that’s also very popular among image-gallery enthusiasts, Supsystic is a great option. The company that developed it has multiple tools, so you have to option to shop in bundles if you’re looking to optimize your website to the fullest.
Here are some of the best features of this plugin:
- Highly customizable gallery styles, from shadows and icons to borders and caption;
- Mobile-responsive;
- Video support;
- Image compression and optimization;
- Watermarking option;
- Load more button and pagination;
- You can import images from FTP and social media;
Pricing
This plugin allows you to benefits from both lite and premium versions, so you can give it a try anytime.

How to install and use Supsystic
You’ll find this plugin if you go to Plugins in your WordPress menu and click Add New. After you find it, press Install and Activate your plugin. You’re now ready to start creating galleries.
You first have to give your gallery a name and choose a template – this is how your gallery will be displayed.
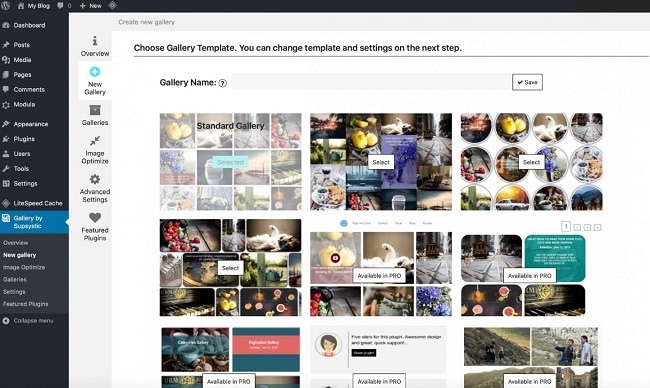
The next step is to upload your pictures and customize the gallery from the Settings section. Save your gallery and insert it somewhere on your website using the generated shortcode.
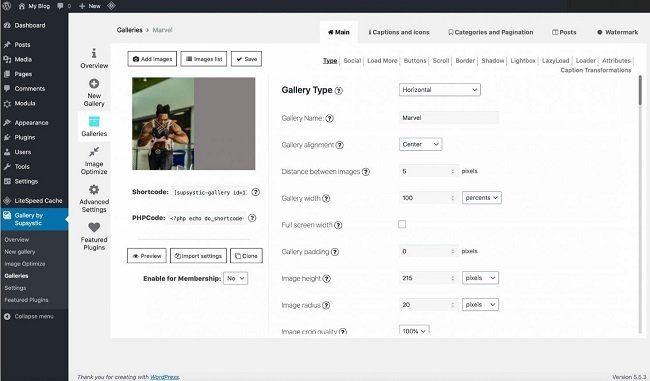
Now that you have all the info on how to build a gallery, let’s see some of the advantages and disadvantages of this plugin:
Advantages:
- The watermarking option is available in the free version;
- Premium allows you to import pictures directly from social media platforms;
Disadvantages:
- The interface is not very user-friendly;
- You don’t get social sharing buttons – you have to install them separately;
5. FooGallery
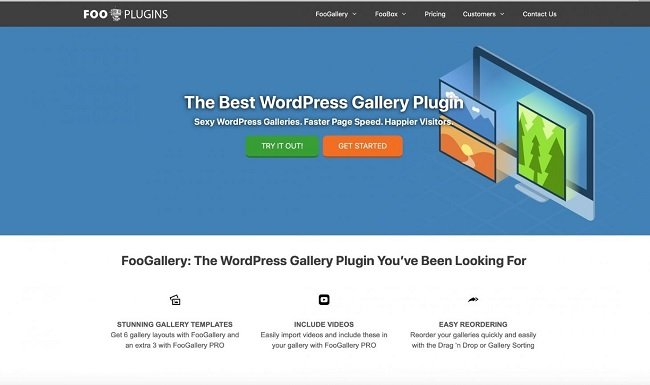
Last but not least comes FooGallery, yet another great image gallery plugin. Easy to use and full of amazing functionalities, this one is definitely worth giving a try. Let’s see some of its amazing features:
- Gallery templates;
- Album organization;
- Bulk copy gallery settings;
- Video support;
- NextGen importer tool;
- Deeplinking support;
Pricing
Yes, of course, FooGallery has a lite version you can try for free or you can opt directly for one of their premium plans.

How can you install and use FooGallery
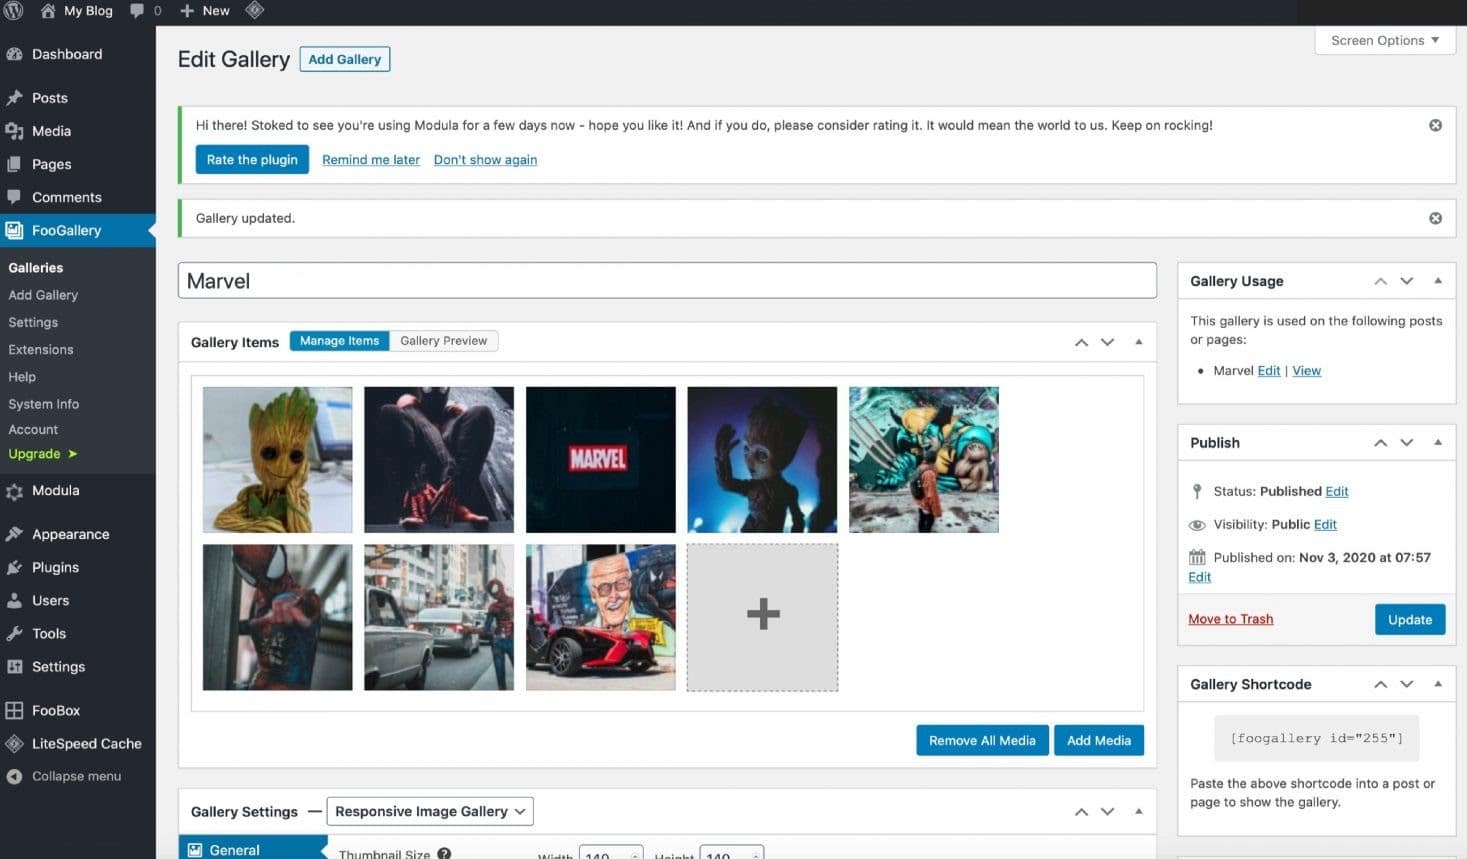
If you’ve read the whole article, you should know by now that, in order to install the plugin you have to go to your WordPress dashboard and find the Plugins option. Look for the FooGallery, Install and Activate it and you’re ready to go.
Start by uploading your pictures. At the bottom of the page, you’ll see some options that allow you to control how your gallery looks.
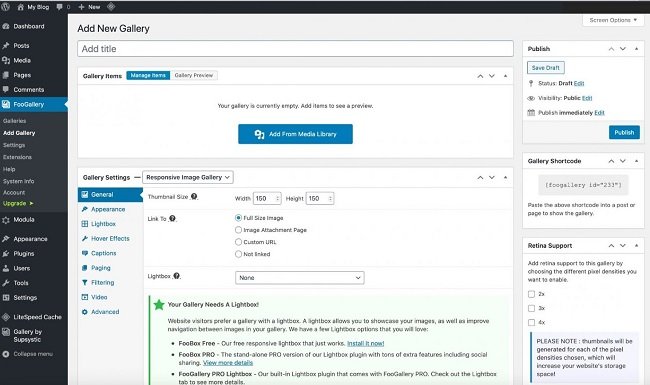
Then, you can rearrange them using the drag and drop functionality and do all the remaining adjustments. You’re now ready to save and publish your gallery!
For the last part of this, let’s see what are its advantages and disadvantages:
Advantages:
- Easy to use;
- A lot of gallery templates if you’re going pro;
Disadvantages:
- No social sharing options;
- There’s no one-time fee involved – you’ll be constantly charged.
Final thoughts
Now you have a rundown of the best image gallery plugin in the WordPress repository. All that’s left is for you to give them a try and see which one suits your needs better.
To help you make up your mind, let’s see which one is the winner:
- If you’re looking for a full-option plugin, that offers amazing functionalities and great support, then Modula is the way to go.
- If you need a great eCommerce integration in an image gallery plugin, NextGen has got you covered.
- If stunning templates are what you’re looking for, then Envira might be the best pick.

